Bitbucket Data Center / Server Integration Setup
Private Packagist Self-Hosted
Documentation
- Quick Start Guide
- Private Networks and Firewalls
- Using Private Packagist in a Composer project
- API Documentation
- Security Monitoring
- Update Review
- Synchronization FAQ
- Composer Authentication
- Cloud Changelog
Features
- Private Composer Packages
- Mirroring Composer Packages
- GitHub, Bitbucket, GitLab and Other Integrations
- Security Monitoring
- Update Review
- Dependency License Review
- Subrepository Setup
- Vendors: Customer Setup
Articles
Private Packagist Self-Hosted
- Self-Hosted Installation Guide
- Integration Setup
- Replicated Native (deprecated)
- Self-Hosted Changelog
This guide explains how to setup an OAuth integration for Private Packagist Self-Hosted with Bitbucket Data Center / Server integration.
If you are using our cloud product at packagist.com, use this guide.
Note: Application Links using OAuth 2 are available since Bitbucket Data Center / Server v7.21. If you are using an older Bitbucket Data Center / Server version then consult theBitbucket Data Center / Server OAuth 1 setup guide.
Initial Setup
Hit the “Add integration“ button on the admin page to get to the form below. To setup a Bitbucket Data Center / Server integration with Private Packagist, start by selecting "Bitbucket Data Center / Server" as the platform, enter the URL of your on-premise Bitbucket Data Center / Server into the base URL field and select OAuth 2 as the OAuth version as seen in the example below.
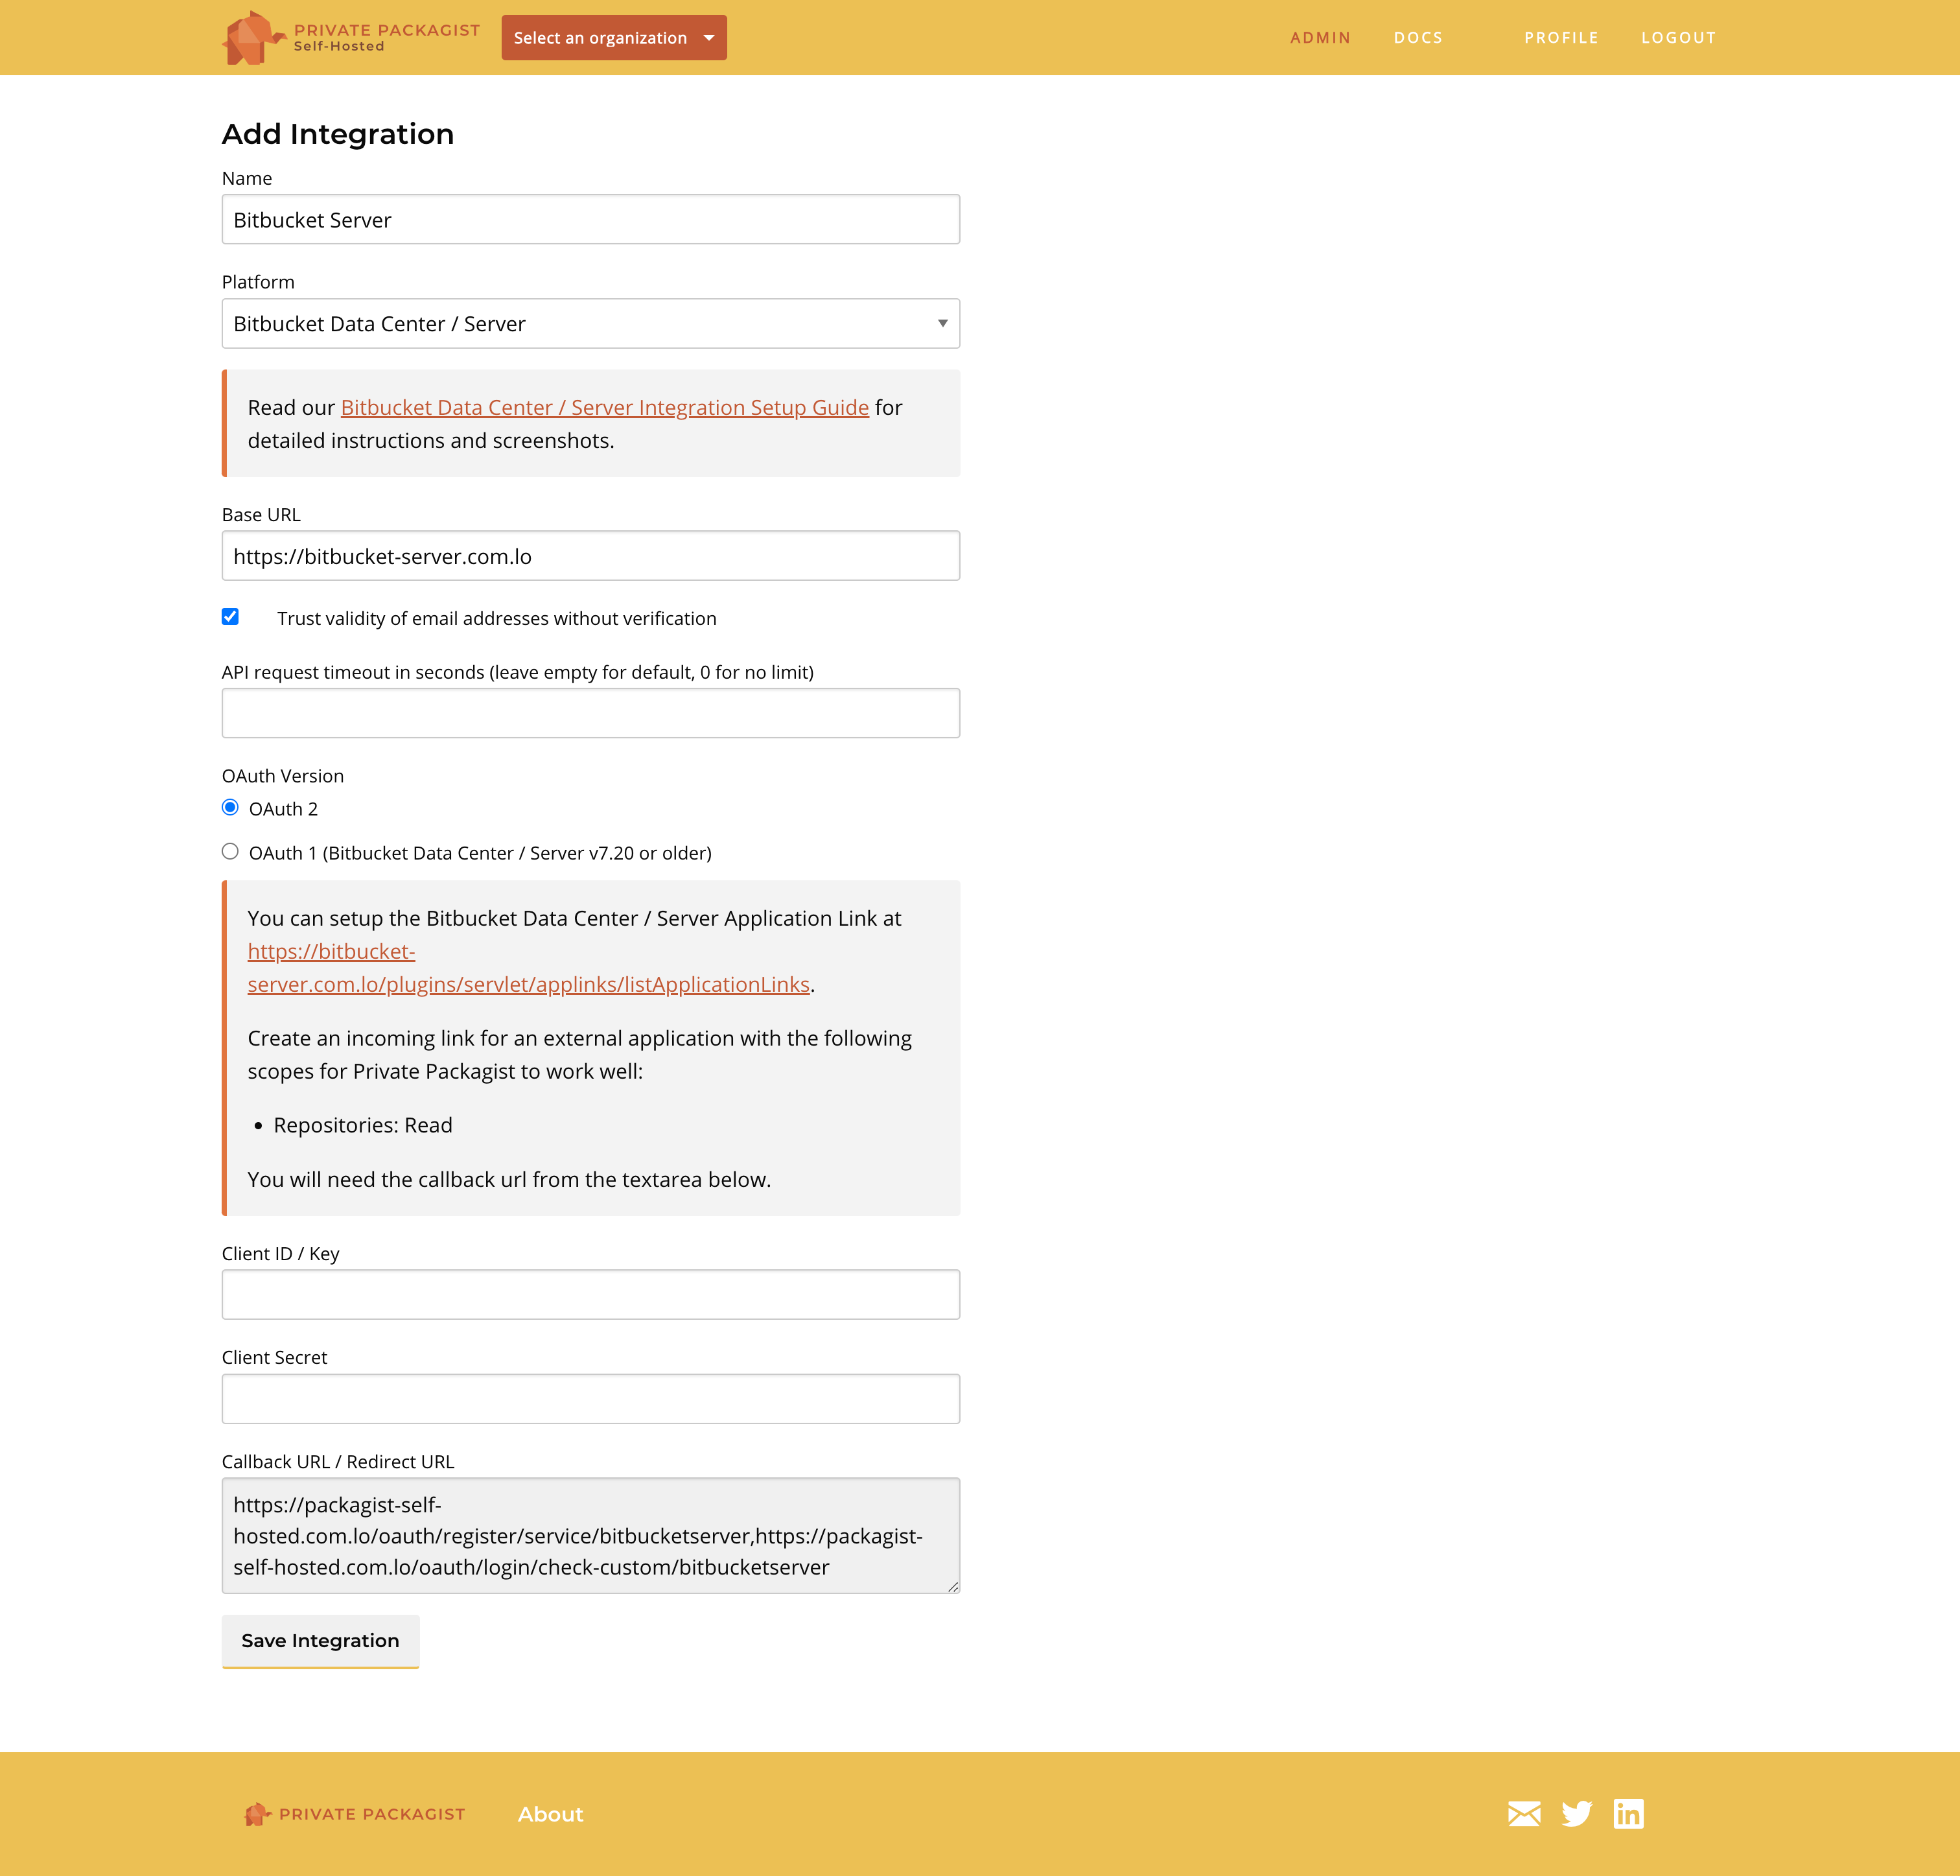
Copy the content from the "Callback URL / Redirect URL" field and follow the link to set up an Application Link.
Configure Application link
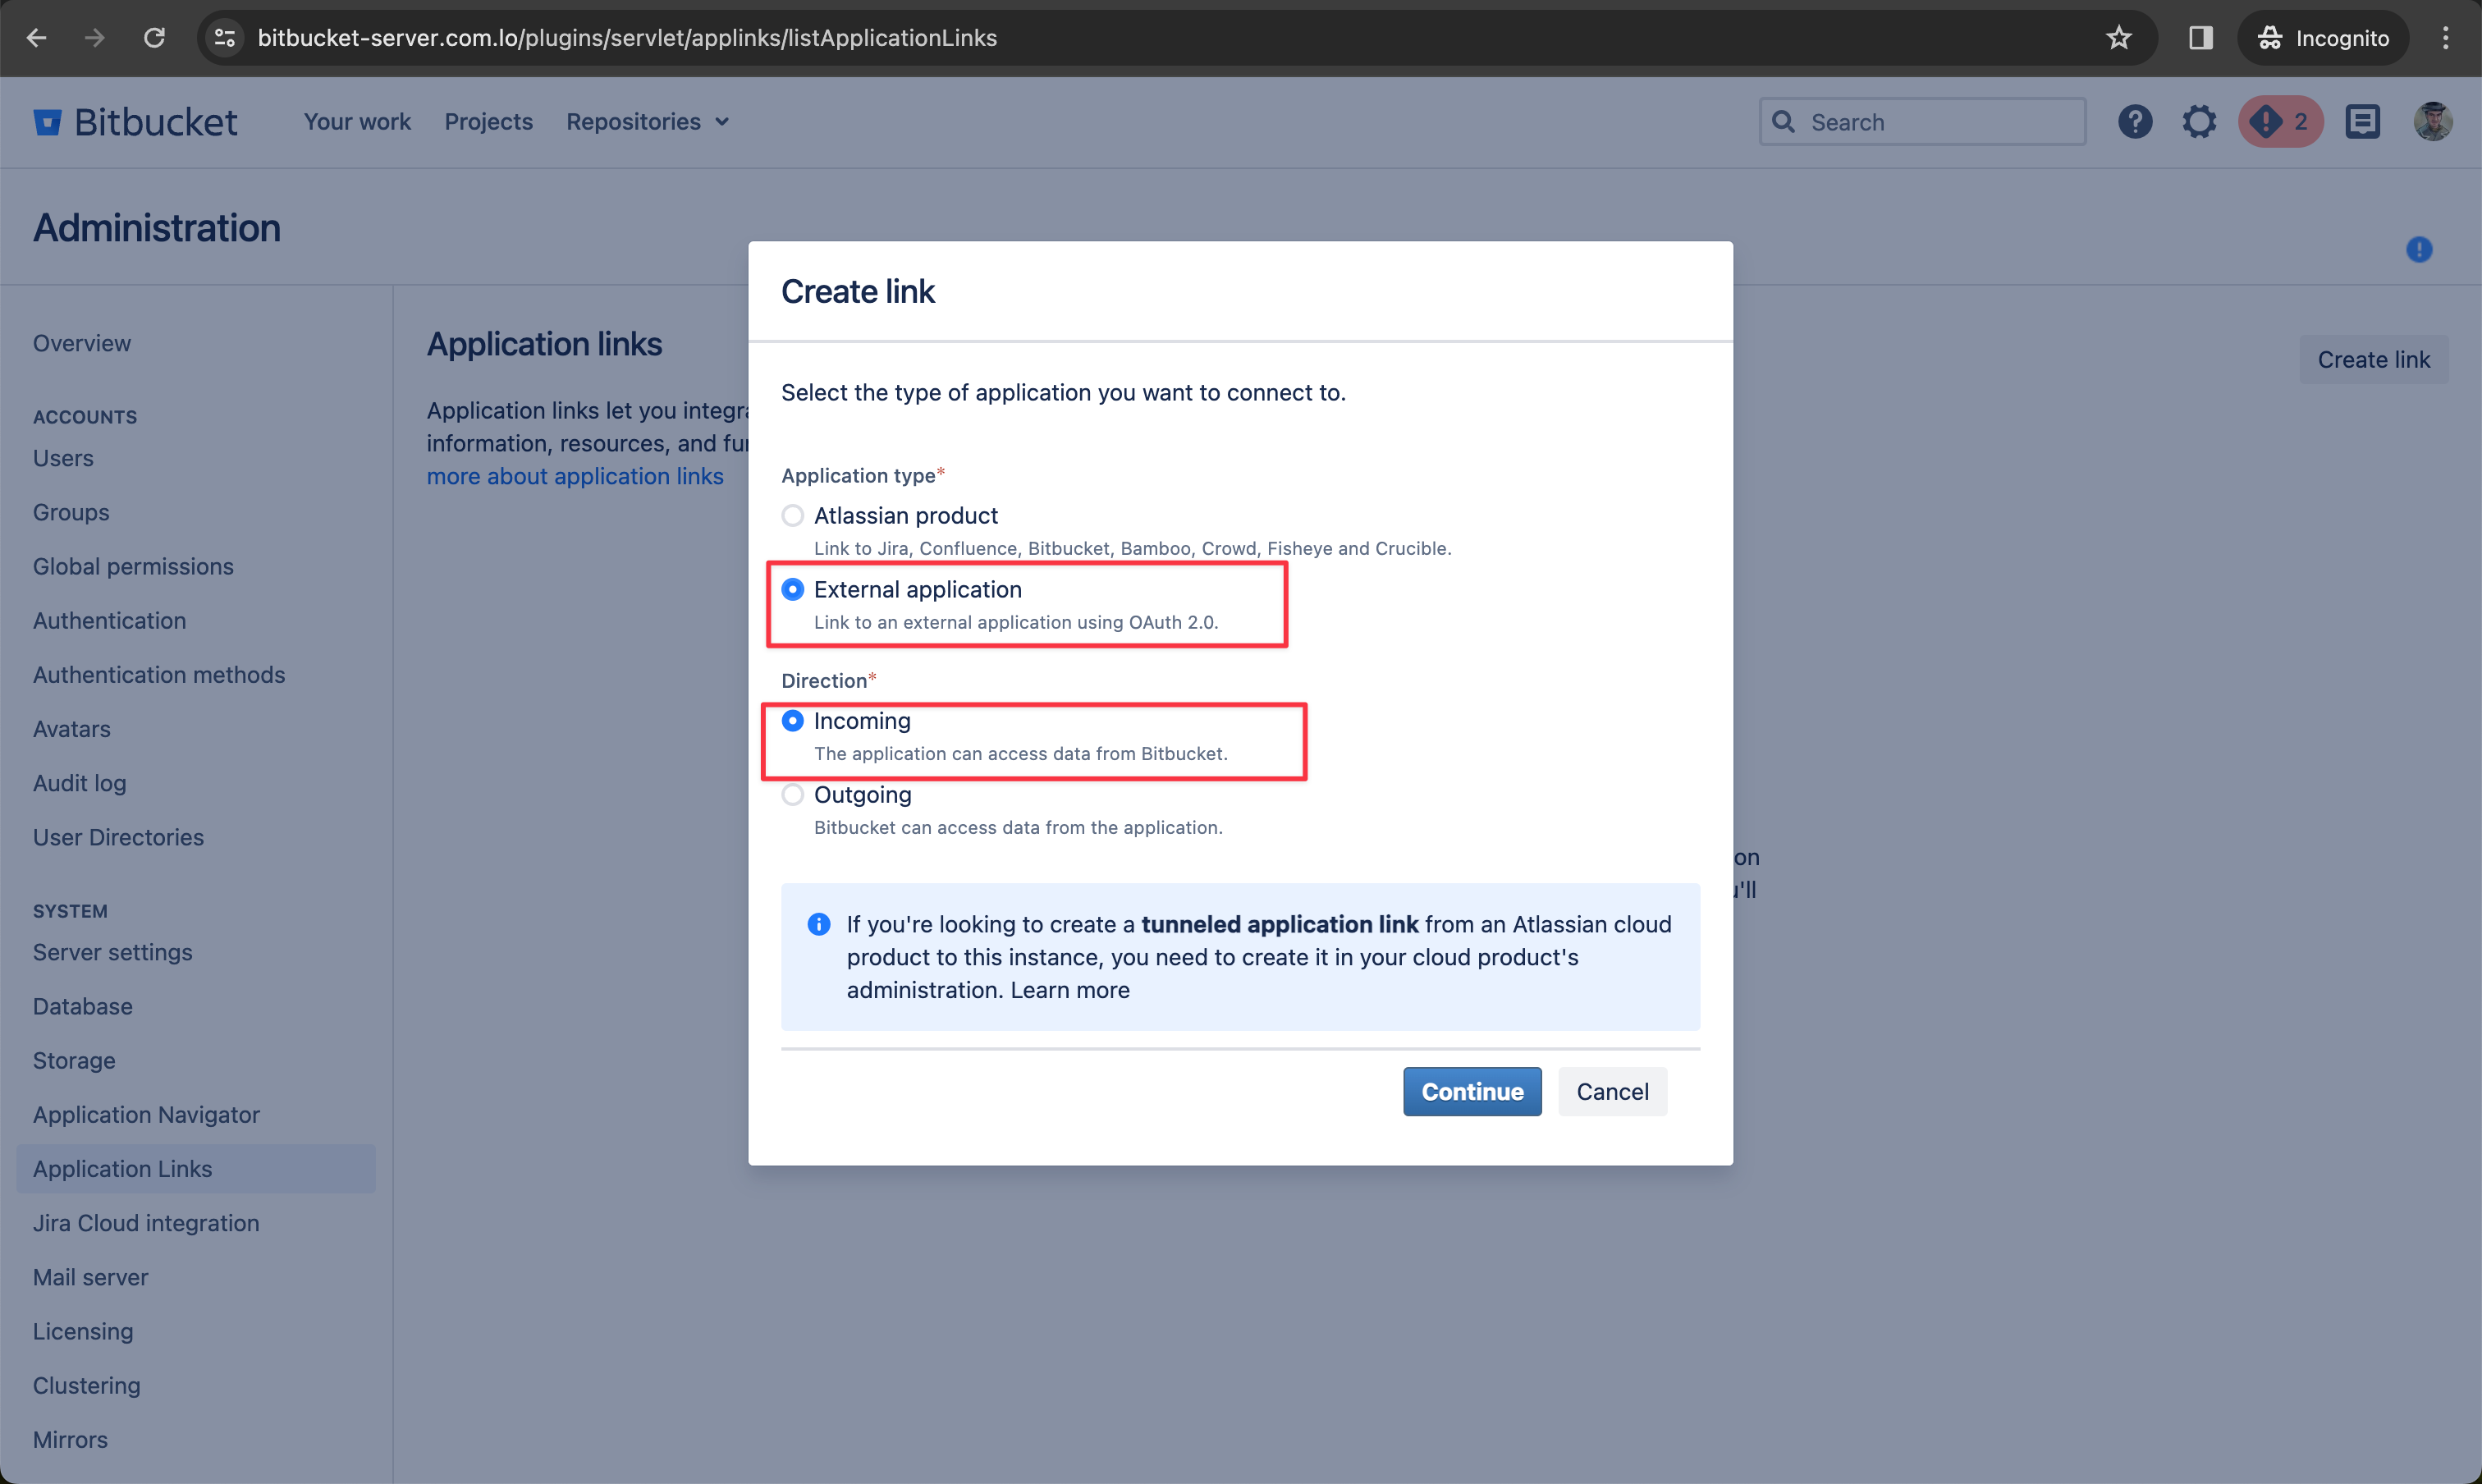
Click on the link to setup an Application Link on Bitbucket Data Center / Server and select "External application" as type and "Incoming" as direction.
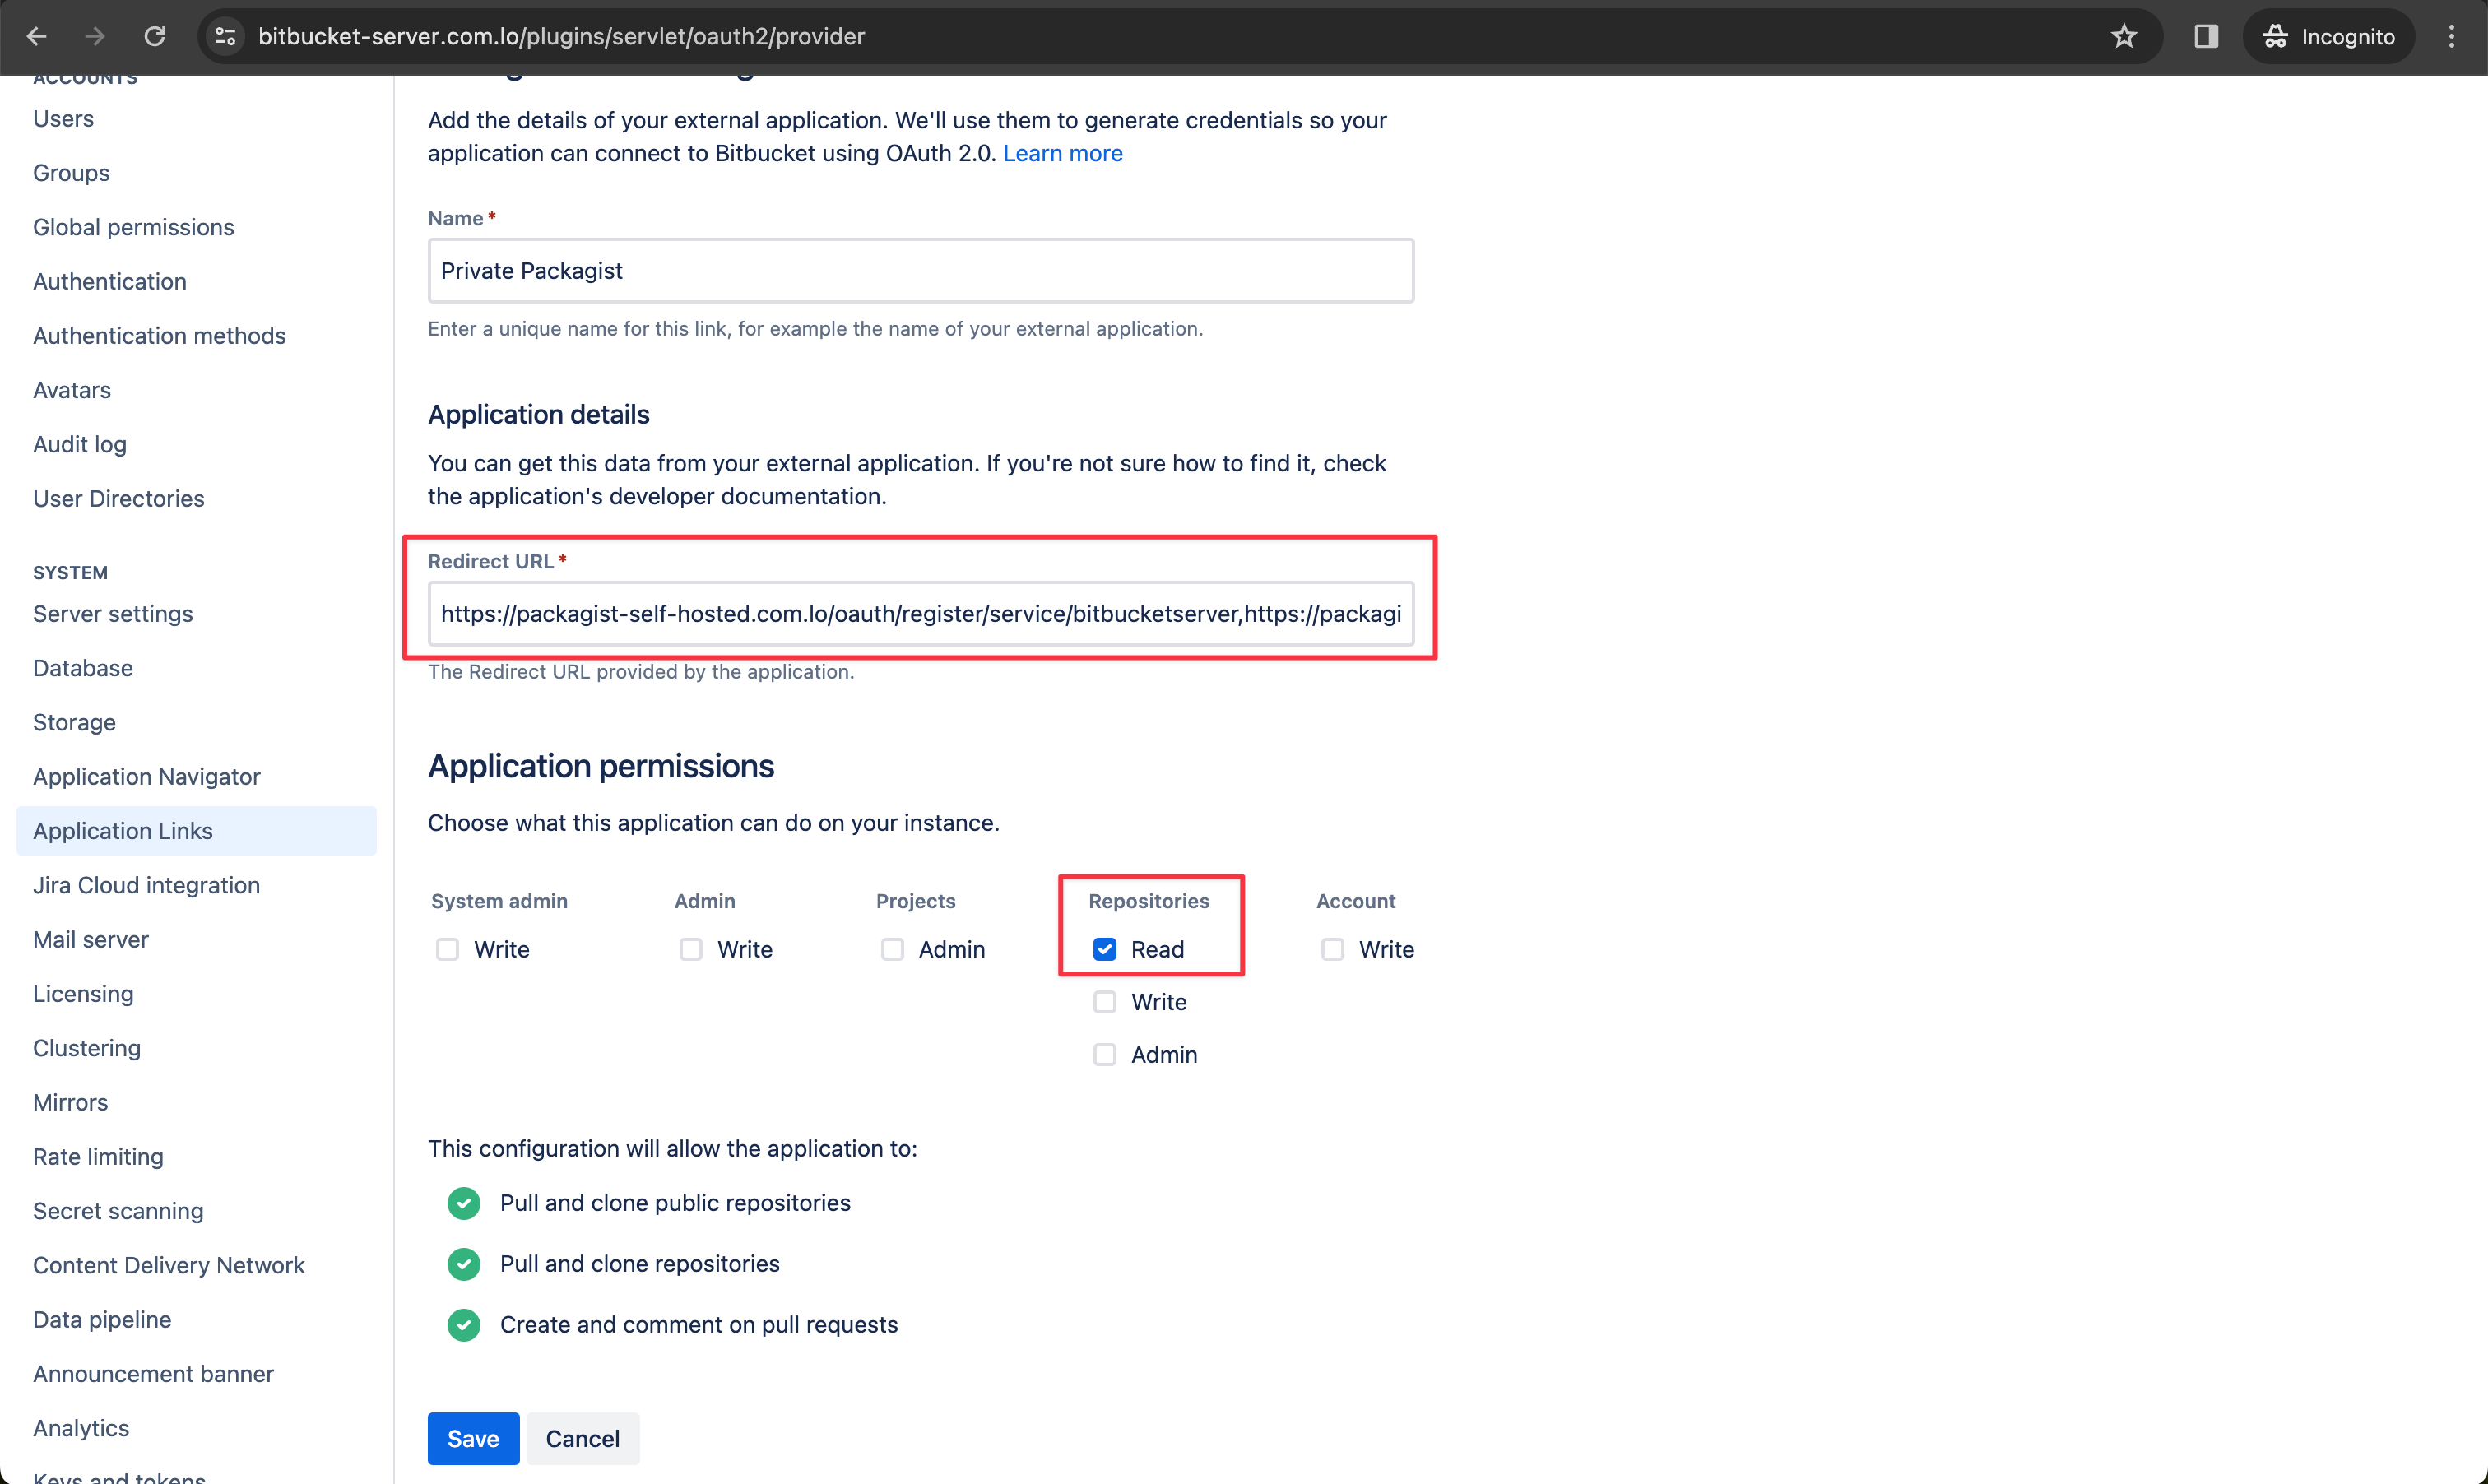
After you click the button to continue, enter a name and the content from the "Callback URL / Redirect URL" from the Private Packagist form. Select Repositories "Read" as application permission and save the form.
Finish the Setup
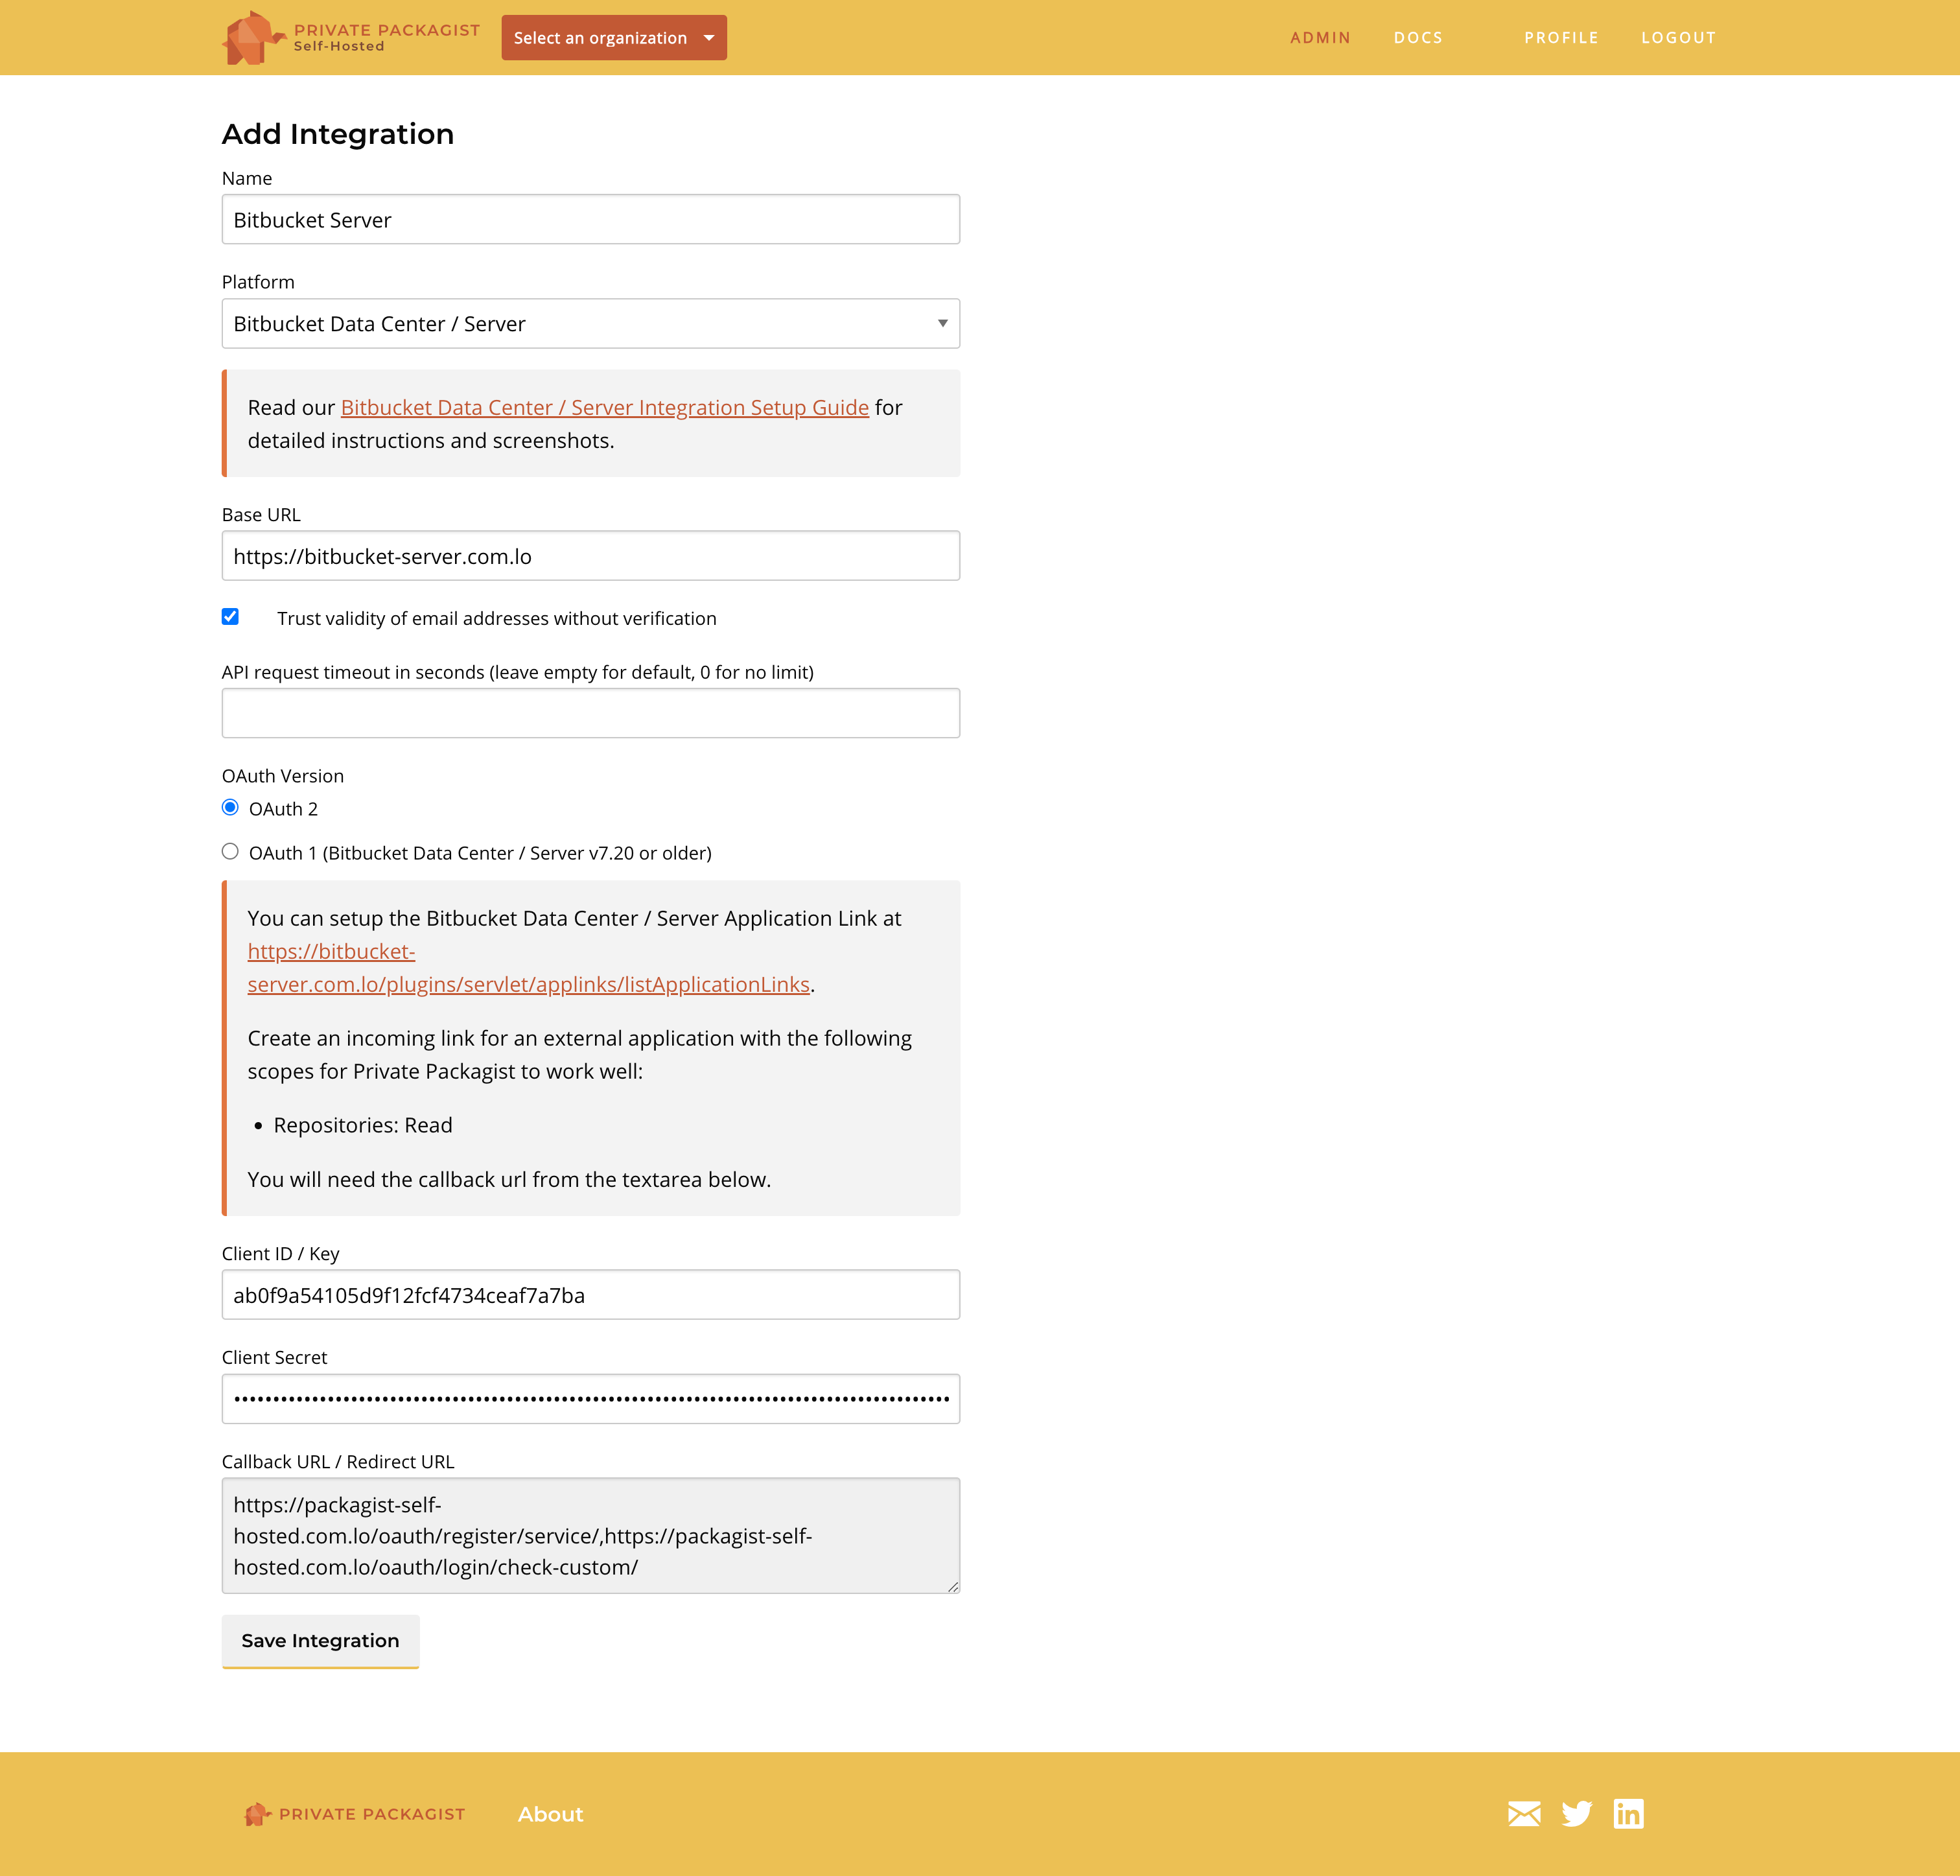
Once the form is saved, Bitbucket Data Center / Server will show you the Client ID and secret. Copy them over to Private Packagist and save the integration.
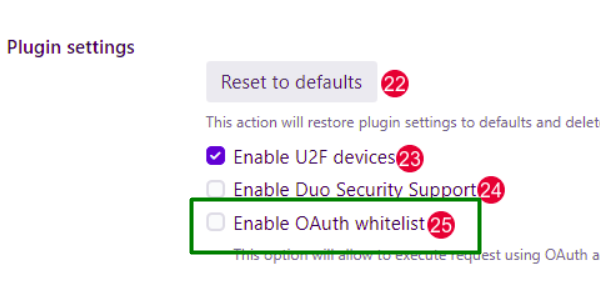
Configure Bitbucket Server plugins
In case the U2F & TOTP plugin by Alpha Server is installed on the Bitbucket Data Center / Server then you will need to enable the OAuth whitelist otherwise Private Packagist won't be able to authenticate with the Bitbucket Data Center / Server.
Start Free Trial
Login to create an organization and start your free trial!
 Bitbucket
 GitHub
 GitLab
 Log in or register with email/password