Private Packagist can be configured to synchronize user access with your code hosting platform (GitHub, Bitbucket, or GitLab), which in turn support authentication mechanisms like Microsoft Entra ID (formerly Azure Active Directory), Okta, LDAP, SAML or OpenID Connect.
You can configure your Private Packagist organization to enforce OAuth authentication for all members with the chosen platform, which in turn then allows users to authenticate with your centralized company system. Private Packagist does not support a direct integration with these authentication mechanisms without the use of OAuth.

Private Packagist uses synchronizations to keep track of which users have access to your repositories. Synchronizations automatically import team member metadata, organizational structure like teams, their permissions and your repositories from your GitHub organization, Bitbucket workspace, or GitLab group. Similarly entries are removed when they disappear on the code hosting platform, so user removal or permission revocation is propagated to Private Packagist through synchronization as well.
The synchronization process enables you to continue managing user accounts from your company’s main Identity Provider (IdP), while providing an already familiar authentication flow to your users. Private Packagist currently supports GitHub, GitLab and Bitbucket in these configurations.
It’s very easy to get started with this approach. We’ll walk you through the required steps below.
1 - Set up the integration
If you are using Private Packagist Cloud and the cloud version of GitHub at github.com, or Bitbucket at bitbucket.org or GitLab at gitlab.com, you can skip this step. Otherwise, the first step is making sure your users can log in using the OAuth authentication flow.
OAuth authentication with the cloud versions of the default code hosting platforms (github.com, bitbucket.org and gitlab.com) is preconfigured on Private Packagist Cloud, but not on Private Packagist Self-Hosted.
Go to Settings > Integrations and press the Add Integration button.

2 - Connect your account via OAuth
Go to your profile and find the Connected Accounts section. Click on the Connect button to go through the OAuth authentication flow, and associate your Private Packagist account with your GitHub, GitLab or Bitbucket account.

3 - Set up the synchronization
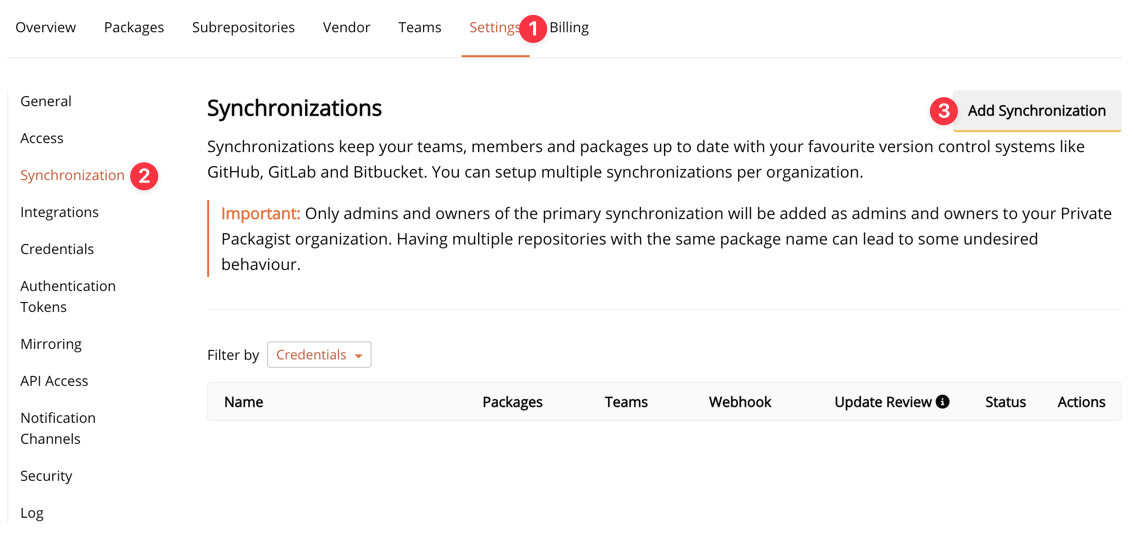
Now we can continue to set up the synchronization. In your organization, go to Settings > Synchronizations and press the Add Synchronization button. Follow the steps to complete the configuration.

Once the synchronization is set up, Private Packagist will retrieve your users and their permissions from the code hosting platform. Private Packagist now knows which users have access to your organization and which repositories and teams/groups they can access once they log in via OAuth. Only users who have logged into Private Packagist using OAuth will be considered active and count for billing purposes.
Whether or not you are using automatic user provisioning, Private Packagist will always manage the same users as those provisioned in your code hosting platform. If a user is removed, that same user will also be removed from Private Packagist.
If you want to control which of your users should be allowed to access Private Packagist at all, you can opt to deactivate users discovered by the synchronization by default. Then, only users that you activate manually will be able to log in. To enable this behavior, go to the Teams tab, and click on View and manage all members of this organization and check the box:

4 - Enforce OAuth authentication
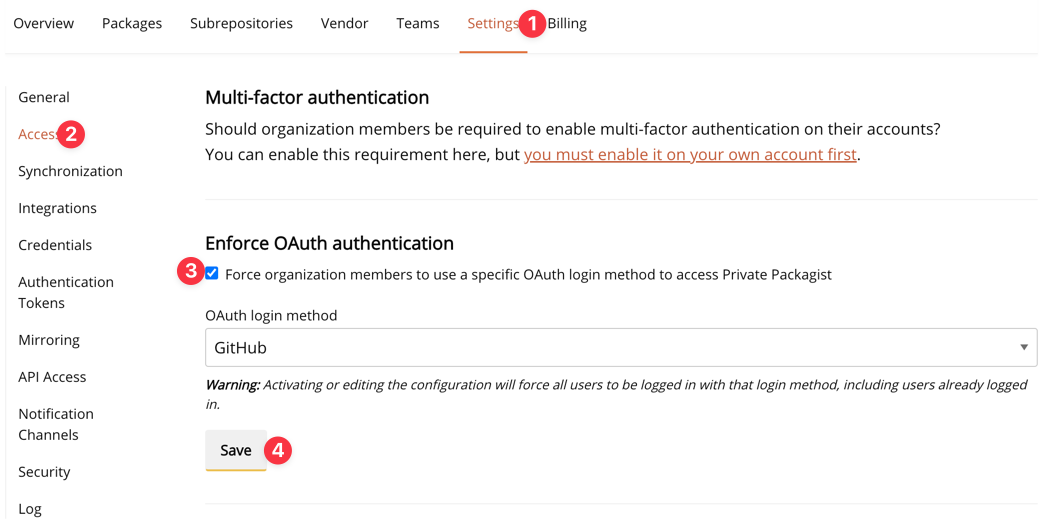
Now we can enforce OAuth authentication for all users in the organization, to ensure that users must authenticate with your identity system configured on the code hosting platform in order to access Private Packagist and cannot use an alternative method to log into Private Packagist.
Go to Settings > Access and apply the changes. From now on, everyone - including yourself - will be required to authenticate via your configured integration.

5 - Share the organization-specific login link
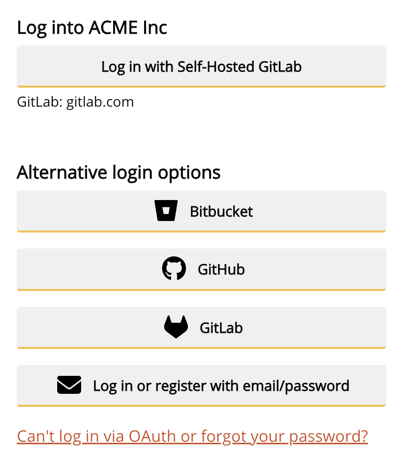
If you set up your own integration in Step 1, the final step is sharing your organization-specific login link with your users. Look for the Login link button in Settings > Integrations page.

This link presents the option to authenticate with your configured integration. Once the user clicks on the Log in with <integration name> button, the authentication process is initiated and your users are redirected to your code-hosting platform to log in.

If you are using one of the default platforms on Private Packagist Cloud, there is no need for a custom login link.
Start Free Trial
Login to create an organization and start your free trial!
