This guide explains how to set up an OAuth integration for Private Packagist Self-Hosted with the public service on Bitbucket.org. If you use Bitbucket Data Center / Server instead, consult this guide for Self-Hosted.
If you are using our Cloud product at packagist.com, this page is not relevant to you.
To allow your users to authenticate to Private Packagist Self-Hosted with their Bitbucket account, you'll first need to create an integration in Private Packagist. This document walks you through the required steps.
Open the Add Integration form
Go to the Admin section and hit the “Add Integration“ button to open the form to create your integration. If you've just installed Private Packagist Self-Hosted and it is still running in Setup Mode, you do not need to log in. If the application is no longer in Setup mode, you will have to log in with an admin account first.
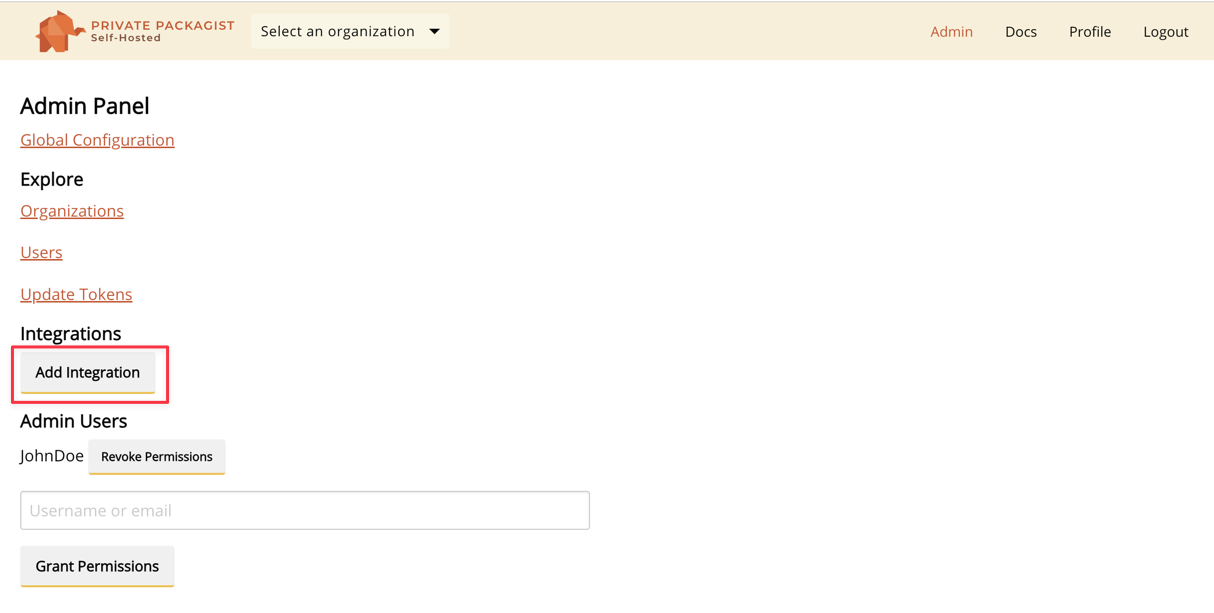
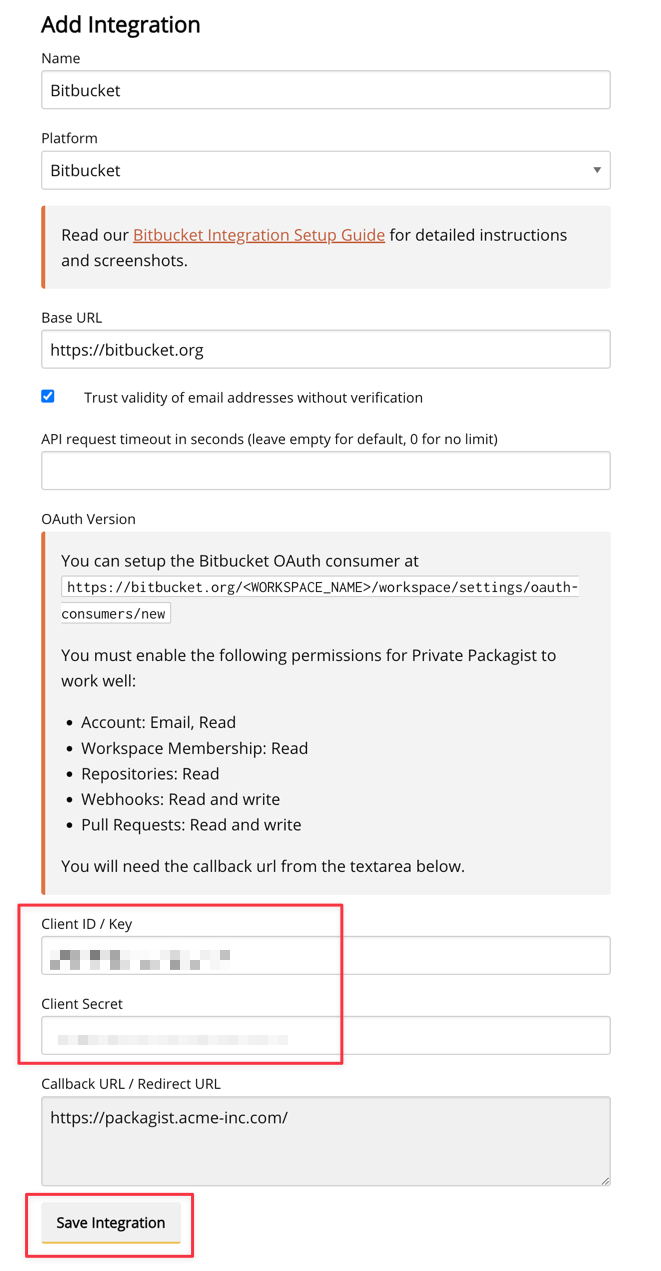
To setup a Bitbucket integration with Private Packagist start by selecting "Bitbucket" as the platform and enter https://bitbucket.org as the base URL, as seen in the example below. A link to set up the OAuth application on Bitbucket will automatically be displayed.
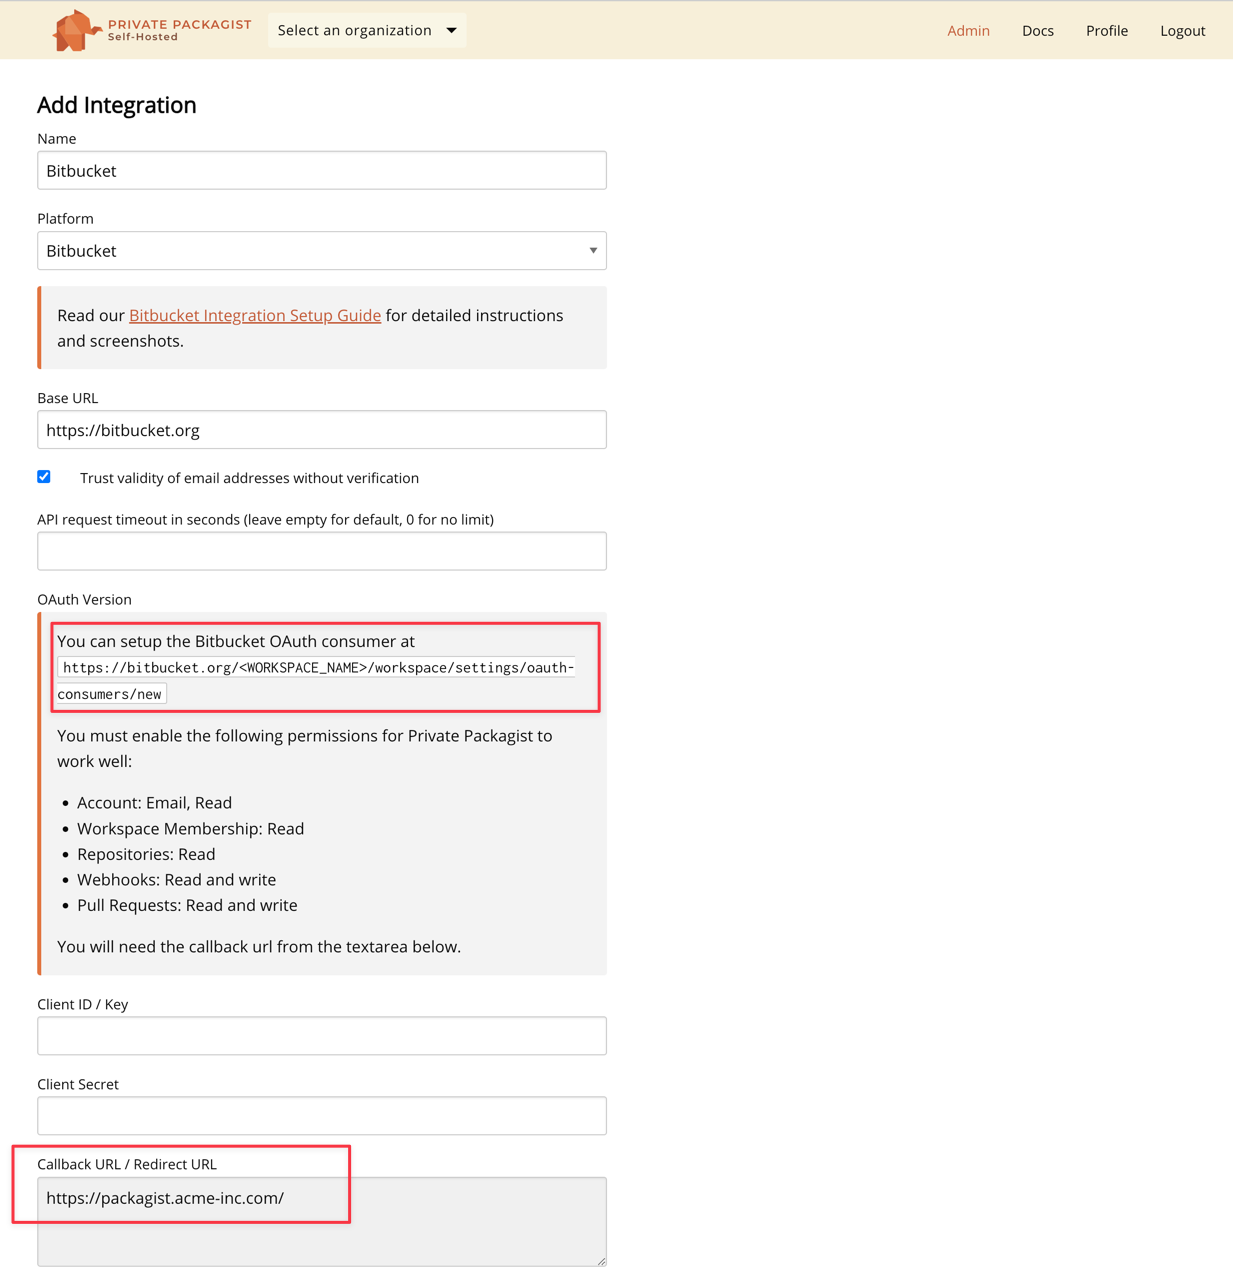
Creating an OAuth Application
Do not submit the integration form yet, the fields Client ID and Client Secret remain empty for now.
Copy the content from the "Callback URL / Redirect URL" and open the setup link to your Bitbucket
account. Replace the <WORKSPACE_NAME> string in the setup link with your actual Bitbucket workspace name.
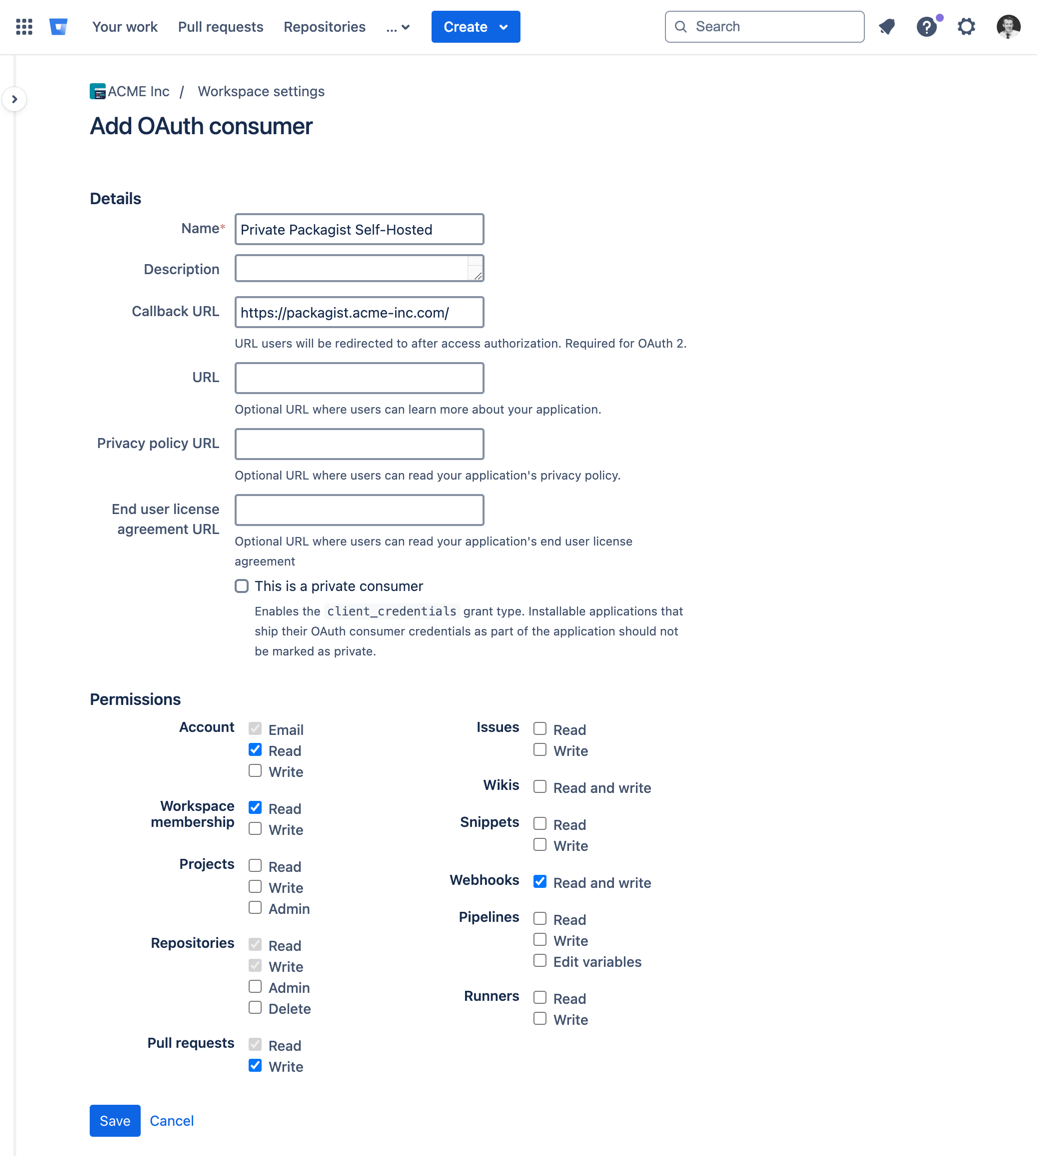
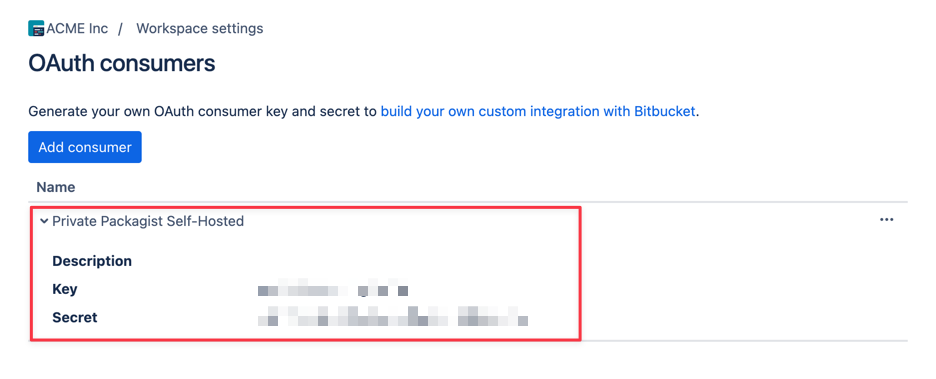
Make sure all the scopes listed on the Private Packagist form are checked and save the new consumer. Click on the consumer you just created to reveal the credentials required to finish the setup on Private Packagist.
Finish the Setup
Copy and paste the "Key" and "Secret" values back into the Private Packagist integration form and submit the form with the "Create Integration" button.
The Bitbucket integration will be created and you will be redirected to the admin page.
The new integration will be shown in the list of available integrations, and your users can now log in to your Private Packagist Self-Hosted installation using their Bitbucket account.

Start Free Trial
Login to create an organization and start your free trial!
