The Private Packagist Self-Hosted Helm chart allows you to install Private Packagist in an existing Kubernetes cluster, to instead install Private Packagist Self-Hosted without an existing Kubernetes cluster, follow this guide.
General requirements
- A Kubernetes cluster v1.23 or newer
- Your username and password to log in to the Helm registry on registry.replicated.com. You can find your credentials in your Private Packagist account at https://packagist.com. Don't have one yet? Sign up for a free trial license!
- One (sub-)domain to operate the web interface, e.g. packagist.myintranet.com
- One (sub-)domain to operate the composer repository, e.g. repo.packagist.myintranet.com or packagist-repo.myintranet.com
- An SSL certificate valid for both chosen domains
- An SMTP server or a GMail account for Private Packagist Self-Hosted to send email
- If your firewall restricts external connections then the following domains must be accessible from the server:
- packagist.org
- index.docker.io
- cdn.auth0.com
- *.docker.io
- *.docker.com
- replicated.app
- proxy.replicated.com
- registry.replicated.com
- Please also consult the list in the Replicated documentation.
- To mirror Composer packages in Private Packagist, the following domains must also be accessible:
- *.packagist.org (required to fetch package metadata)
- github.com (required to download ZIP files for mirrored packages)
- api.github.com (required to download ZIP files for mirrored packages)
- Any other mirrored third-party repository you use like drupal.org, asset-packagist.org, or repo.magento.com
Installation
Private Packagist Self-Hosted requires PostgreSQL, Redis, and blob storage to store application data and Composer packages. You can either use the built-in options that come with the Helm chart or use your own PostgreSQL, Redis, and blob storage. For blob storage, we currently support Azure Blob Storage, Google Cloud Storage, AWS S3, and other S3-compatible storage solutions.
Please note that if you choose to use the built-in solution then each of the storage requires one or more volumes using
dynamic volume provision to allocate storage for the different Pods.
Configure the Storage Class in the values.yaml under global.storageClass.
Annotated configuration
To install the Private Packagist Self-Hosted Helm Chart configure values based on your setup, store them in a YAML file, e.g. values.yaml, and then run the commands below.
global:
    # If any of the built-in storage mechanisms are used, configure a storage class that should be used
    storageClass: 'default'

    # Sequence value to force a redeployment of all containers
    sequence: 1

    # Configure what Kubernetes service type should be used in front of the ui and repo pod, as well as MinIO if the built-in storage is used.
    serviceType: 'ClusterIP' # NodePort, ClusterIP

    # If required, configure a different service account for the pods to use
    serviceAccountName: 'default'

application:
    # Configure setup mode to configure Private Packagist
    # This allows you to access the admin section without requiring an account
    setupMode:
        enabled: false

    # Configure HTTP_PROXY AND NO_PROXY if a proxy needs to be used to access package information
    httpProxy: ''
    noProxy: ''

    # Select which level of backward compatibility you require for clients connecting to Private Packagist over HTTPS. The levels refer to Mozilla's recommendations at https://wiki.mozilla.org/Security/Server_Side_TLS and the recommended setting is intermediate.
    # If you are using older linux distributions or versions of OpenSSL you may need to use the default "Old" setting to be able to connect to your installation.
    # Either set the value to "old" for (TLS 1.0+) or "intermediate" for (TLS 1.2+)
    tls:
        level: 'intermediate' # old, intermediate

    # Paste the PEM formatted public certificates as plain text including the BEGIN/END sections.
    # If you need to add multiple certificates, just paste them all one after another e.g.
    # certificateAdditions: |
    #     -----BEGIN PUBLIC KEY-----
    #     ABC/KEY1/XYZ
    #     -----END PUBLIC KEY-----
    #     -----BEGIN PUBLIC KEY-----
    #     ABC/KEY2/XYZ
    #     -----END PUBLIC KEY-----
    certificateAdditions: '' # deprecated, use certificateAdditionSecret instead
    certificateAdditionSecret:
        enabled: false
        name: 'private-packagist-secret'
        key: 'ca.crt'

    # HTTPS port used to generate URLs
    httpsPort: 443

    # Hostname for the UI
    hostnameUi: ''
    # Hostname for the Composer repository
    hostnameRepo: ''

    # Number of background worker processes (min 4, max 75).
    # Set this to 0 to size automatically: with a worker memory limit (resources.worker.limits.memory) set,
    # the number of workers is (limit / 600MB); otherwise ((node total memory - 1GB) / 600MB, e.g. 5 workers on 4GB).
    numberOfWorkers: 0

    # Generate three 64 long random strings (must not contain the % character). They are used to generate webhook and invite URLs and to verify internal requests.
    # Changing the secrets once the app is running will break existing URLs
    secrets:
        existingSecretName: 'private-packagist-secret' # The name of the secret where the application secret keys can be found
        genericKey: 'applicationsecret.generic'
        inviteKey: 'applicationsecret.invite'
        internalKey: 'applicationsecret.internal'

ingress:
    enabled: false
    className: 'default' # The spec.ingressClassName to configure the Ingress resource
    annotations: {}
    tls:
        enabled: false
        secretName: 'cert_issuer' # The name of the secret that is used to configure TLS

# Configure the Prometheus integration, this requires that Prometheus (https://prometheus.io/) is available and the ServiceMonitor Custom Resource exists in your cluster
prometheus:
    enabled: false

# Configure the Velero integration for backups, this requires that Velero (https://velero.io/) is installed in your cluster
velero:
    enabled: false

# Configure if and how the Private Packagist application should send emails
email:
    type: 'no-mail' # no-mail, smtp, gmail
    existingSecretName: 'private-packagist-secret' # The name of the secret where the usernameKey and passwordKey can be found
    fromEmail: 'test@example.org'
    smtp:
        host: 'localhost'
        usernameKey: 'mailer.username'
        passwordKey: 'mailer.password'
        encryption: 'none' # none, ssl, tls
        port: ''
    gmail:
        usernameKey: 'mailer.username'
        passwordKey: 'mailer.password'

# Configure PostgreSQL storage
# We actively support and test against PostgreSQL version 12. We aren't aware of any issues using PostgreSQL versions 13, 14, 15, 16, and 17 and will address any issues reported for those versions.
postgresql:
    type: 'built-in' # built-in, external
    existingSecretName: 'private-packagist-secret' # The name of the secret where the postgres usernameKey and passwordKey can be found
    builtIn:
        usernameKey: 'database.username'
        passwordKey: 'database.password'
    external:
        usernameKey: 'database.username'
        passwordKey: 'database.password'
        database: postgres
        databaseKey: ~ # If set will be used instead of postgresql.external.database
        host: postgresql
        hostKey: '' # If set will be used instead of postgresql.external.host
        port: 5432
        portKey: '' # If set will be used instead of postgresql.external.port
        sslmode: 'prefer' # See for options https://www.postgresql.org/docs/12/libpq-connect.html#LIBPQ-CONNECT-SSLMODE
        sslmodeKey: '' # If set will be used instead of postgresql.external.sslmode
        version: 12

# Configure Redis storage
redis:
    type: 'built-in' # built-in, external
    existingSecretName: 'private-packagist-secret' # The name of the secret where the redis passwordKey can be found
    external:
        tls: false
        passwordKey: 'redis.password'
        host: redis
        port: 6379

# Configure Blob storage
storage:
    type: 'built-in' # built-in, s3, azure, google, other-s3
    existingSecretName: 'private-packagist-secret' # The name of the secret where the storage authentication can be found
    bucket: ''
    region: 'eu-west-1'
    builtInStorage:
        replicas: 4
        keyKey: 'storage.s3.key'
        secretKey: 'storage.s3.secret'
    externalS3:
        # If you are using AWS EKS and need to authenticate through
        # IAM roles for service accounts (IRSA), set the values
        # of the secrets these keys reference to empty strings.
        # See: https://docs.aws.amazon.com/eks/latest/userguide/iam-roles-for-service-accounts.html
        keyKey: 'storage.s3.key'
        secretKey: 'storage.s3.secret'
    externalGoogle:
        # Set to empty string ('') to use GKE Workload Identity instead of a JSON key file.
        googlejsonKey: 'storage.google.json'
    externalAzure:
        azureconnectionKey: 'storage.azure.connection'
    externalOtherS3:
        keyKey: 'storage.s3.key'
        secretKey: 'storage.s3.secret'
        endpoint: ''

# Common labels added to every deployed resource
commonLabels: {}

replicated:
    commonLabels: {}
#    privateCASecret: # optional if you use a custom CA for your proxy
#        name: private-packagist-secret
#        key: 'ca.crt'
#    extraEnv: # Configure a HTTP_PROXY for the replicated pod
#        - name: HTTP_PROXY
#          value: "http://proxy:8080"
#        - name: HTTPS_PROXY
#          value: "http://proxy:8080"
#        - name: NO_PROXY
#          value: "127.0.0.1,10.0.0.0/8"

# Configure resources requests and limits for each container
resources:
    # The ui pod runs the application you access in the browser.
    ui:
        # frontend is the nginx container that proxies requests to
        # the PHP-FPM container and does not require a lot of resources.
        frontend: {}
#            limits:
#                cpu: 0.5
#                memory: 500Mi
#            requests:
#                cpu: 0.5
#                memory: 250Mi
        # ui is the PHP-FPM container, and scales processes
        # dynamically based on the number of concurrent requests.
        # Based on our own data, 2 CPU and 2-4 GB of memory should be
        # enough to cover most use-cases.
        ui: {}
#            limits:
#                cpu: 2
#                memory: 4Gi
#            requests:
#                cpu: 2
#                memory: 2Gi
    # The repo pod runs the Composer repository and will have
    # bursts of load every time composer require/update is run.
    # Running these commands in one of your projects might be
    # helpful to verify that you didn't underscale the Repo pod.
    repo:
        # frontend is the nginx container that proxies requests to
        # the PHP-FPM container and does not require a lot of resources
        frontend: {}
#            limits:
#                cpu: 0.5
#                memory: 500Mi
#            requests:
#                cpu: 0.5
#                memory: 250Mi
        # repo is the PHP-FPM container, and scales processes dynamically
        # based on the number of concurrent requests.
        # 2 CPU and 2-4 GB of memory should be enough to cover most use-cases.
        # Note that you will need a higher memory limit for repo if you still
        # have projects that use Composer 1, as this generates longer running
        # requests with higher memory usage.
        repo: {}
#            limits:
#                cpu: 2
#                memory: 4Gi
#            requests:
#                cpu: 2
#                memory: 2Gi
    # The required resources for the worker container is determined by the number of
    # background worker processes you want to run simultaneously. Refer to the
    # calculation example for the application.numberOfWorkers setting above.
    worker: {}
#        limits:
#            cpu: 2
#            memory: 4Gi
#        requests:
#            cpu: 2
#            memory: 4Gi
    # Only relevant if you use the built-in storage
    minio: {}
    # Only relevant if you use the built-in PostgreSQL option
    postgres: {}
    # Only relevant if you use the built-in Redis option
    redis: {}
Login to the Helm registry and install the chart
Make sure you replace YOUR_USERNAME, YOUR_PASSWORD, values.yaml, and VERSION with your values before running the commands.
You can find the latest Private Packagist version on our changelog page.
helm registry login registry.replicated.com --username YOUR_USERNAME --password YOUR_PASSWORD
helm install -f values.yaml private-packagist oci://registry.replicated.com/privatepackagistkots/private-packagist --version VERSION
Verify that the helm chart is deployed by running kubectl get pods and verifying that the repo, ui, and worker pods are running.
You should then be able to access the web interface by opening the configured domain in the browser, e.g. https://packagist.myintranet.com.
Authentication Setup
Within Private Packagist Self-Hosted, you now need to set up at least one user authentication method. You have the choice between authentication with email addresses and passwords and several OAuth integrations with third-party services. We provide integrations with on-premises versions of GitHub, Bitbucket, GitLab, or their public services on github.com, bitbucket.org, or gitlab.com. Follow the instructions to create the respective required identifiers, tokens, and secrets.
- GitHub (Enterprise) Integration Setup
- Bitbucket.org Integration Setup
- Bitbucket Data Center / Server Integration Setup
- GitLab Integration Setup
- Authentication with Email Addresses and Passwords.
Even if you only plan to let users log in with email addresses and passwords, note that an OAuth integration is also required for synchronization of teams, members, permissions, and packages from GitHub, Bitbucket, or GitLab. This step is required before any synchronization can be set up.
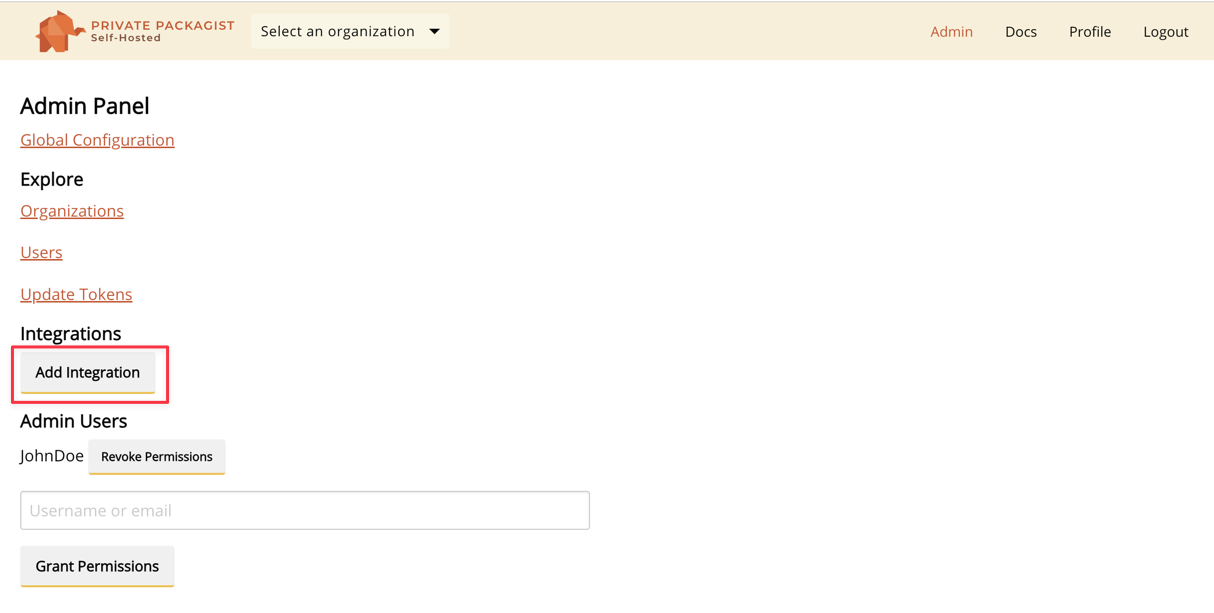
Selecting Admins
After setting up an integration, you can log in through the top menu. Register an account and pick a username.
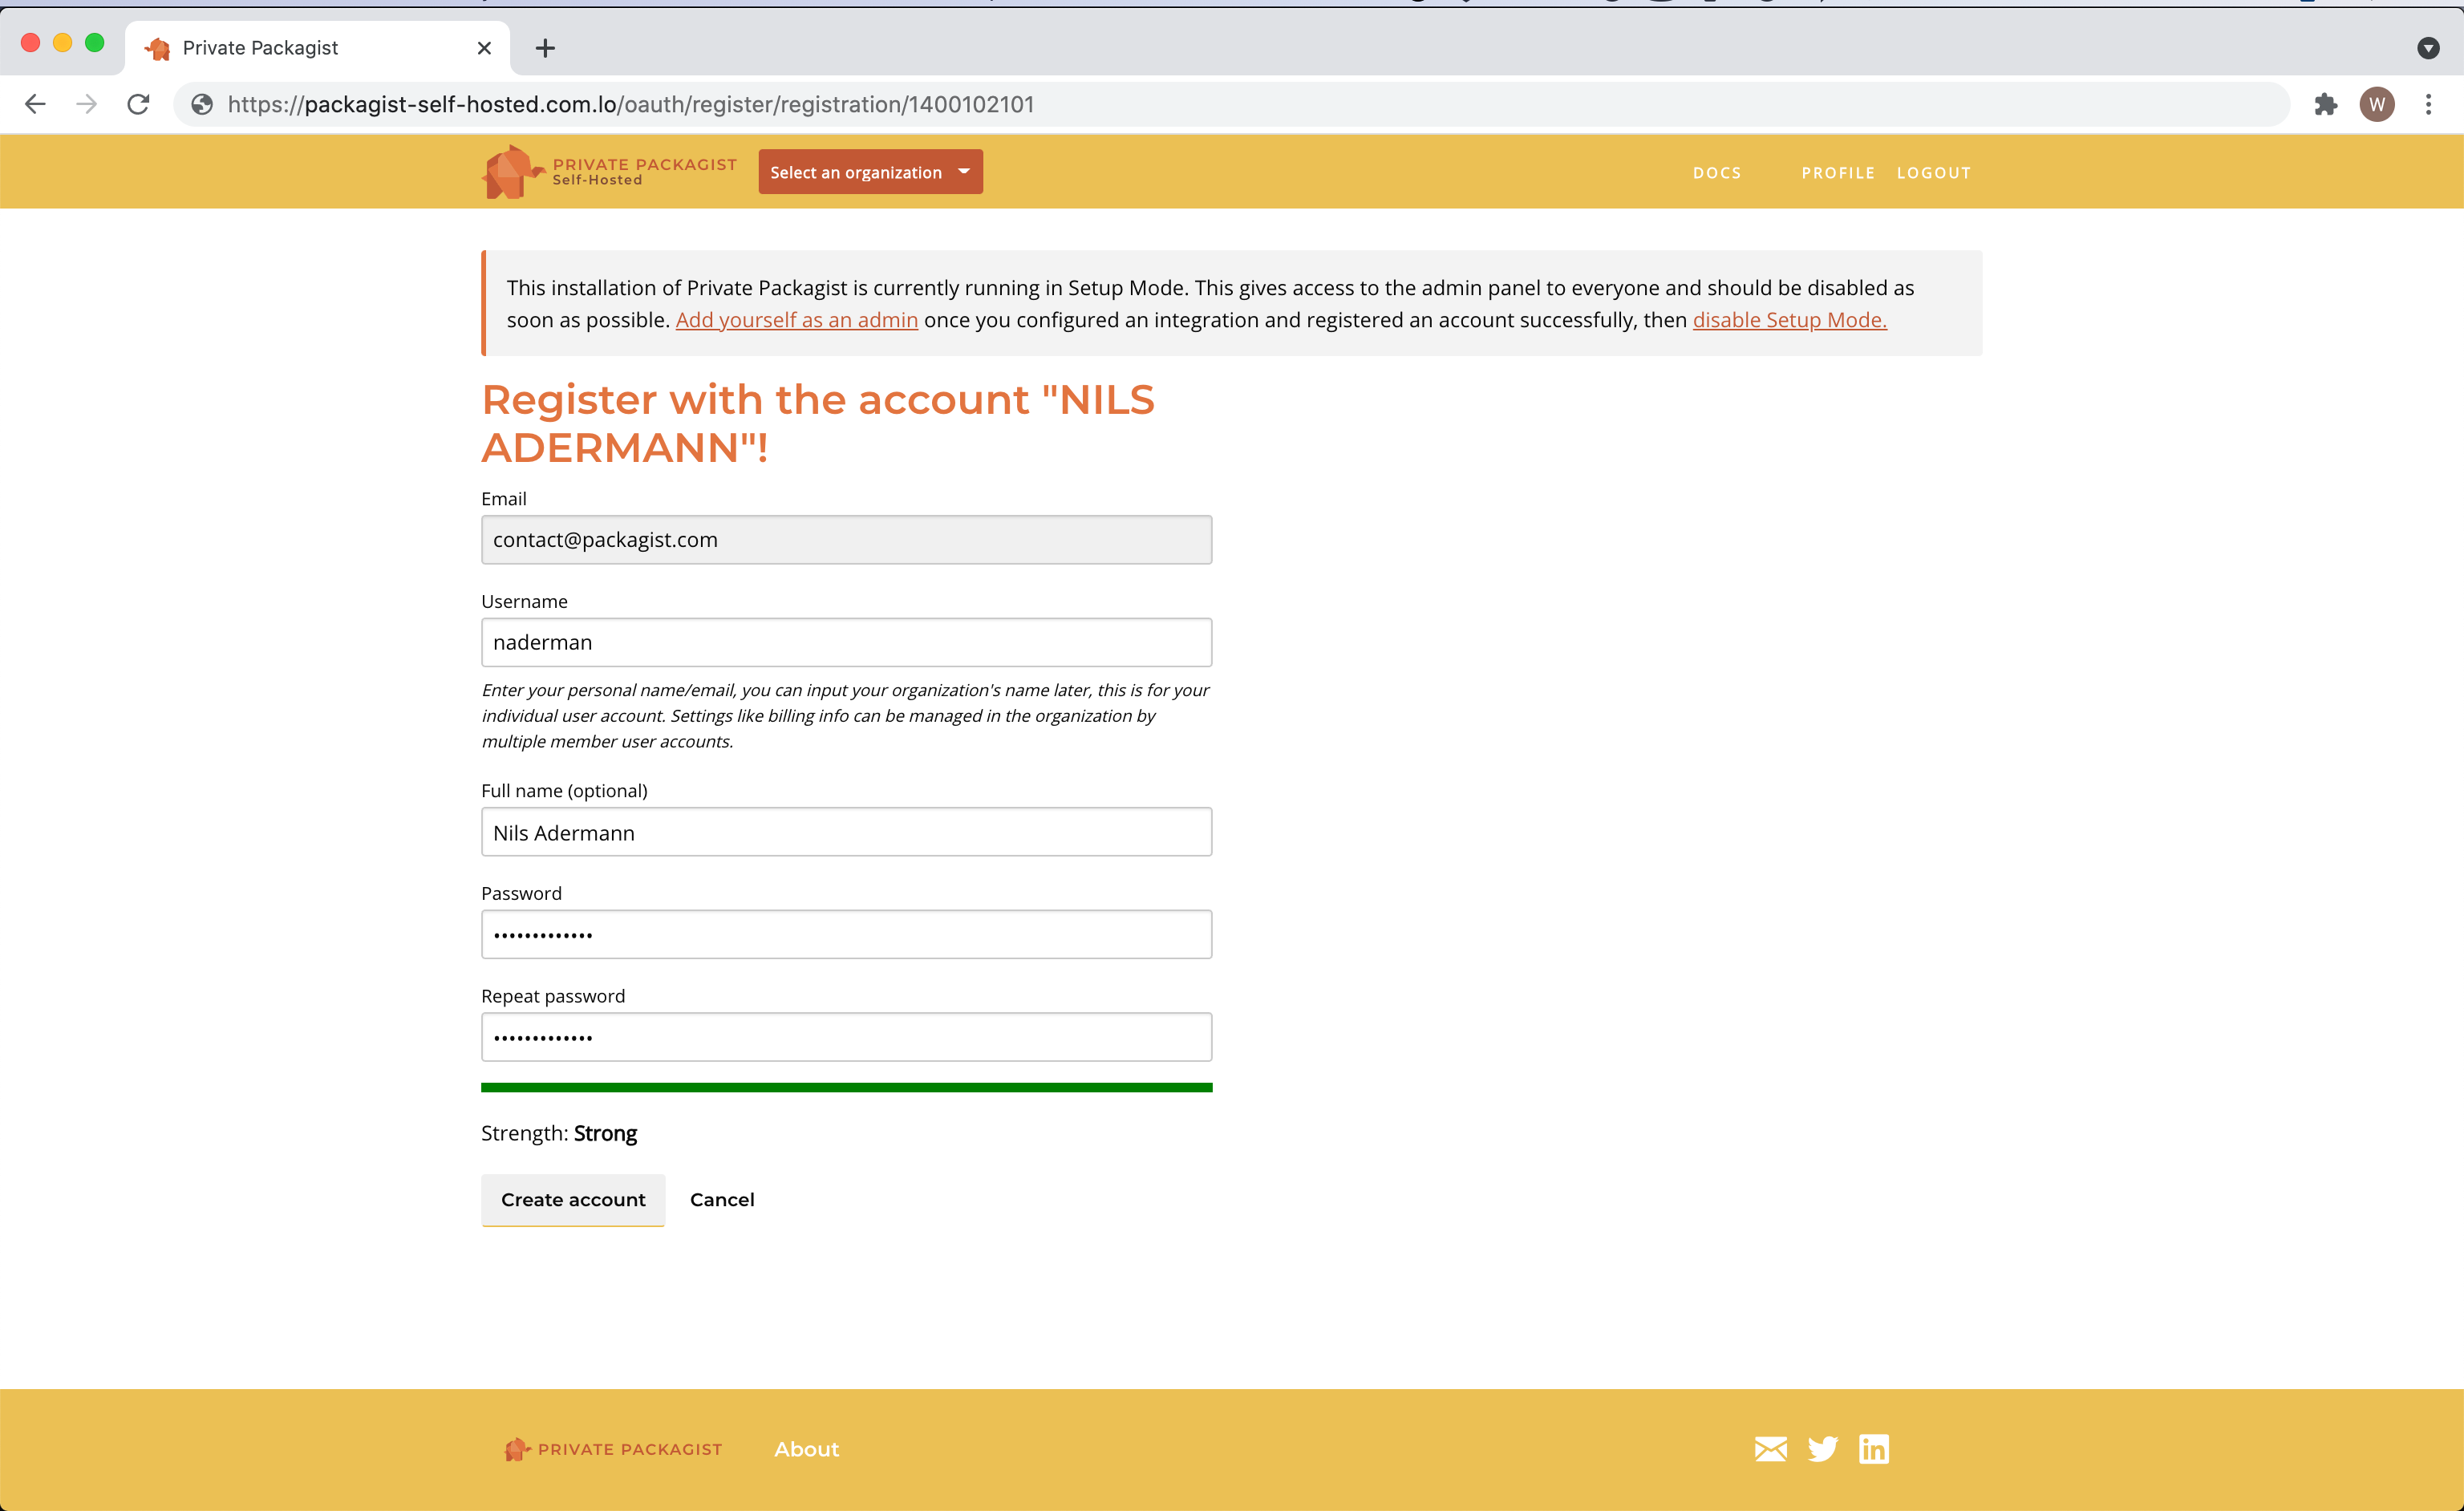
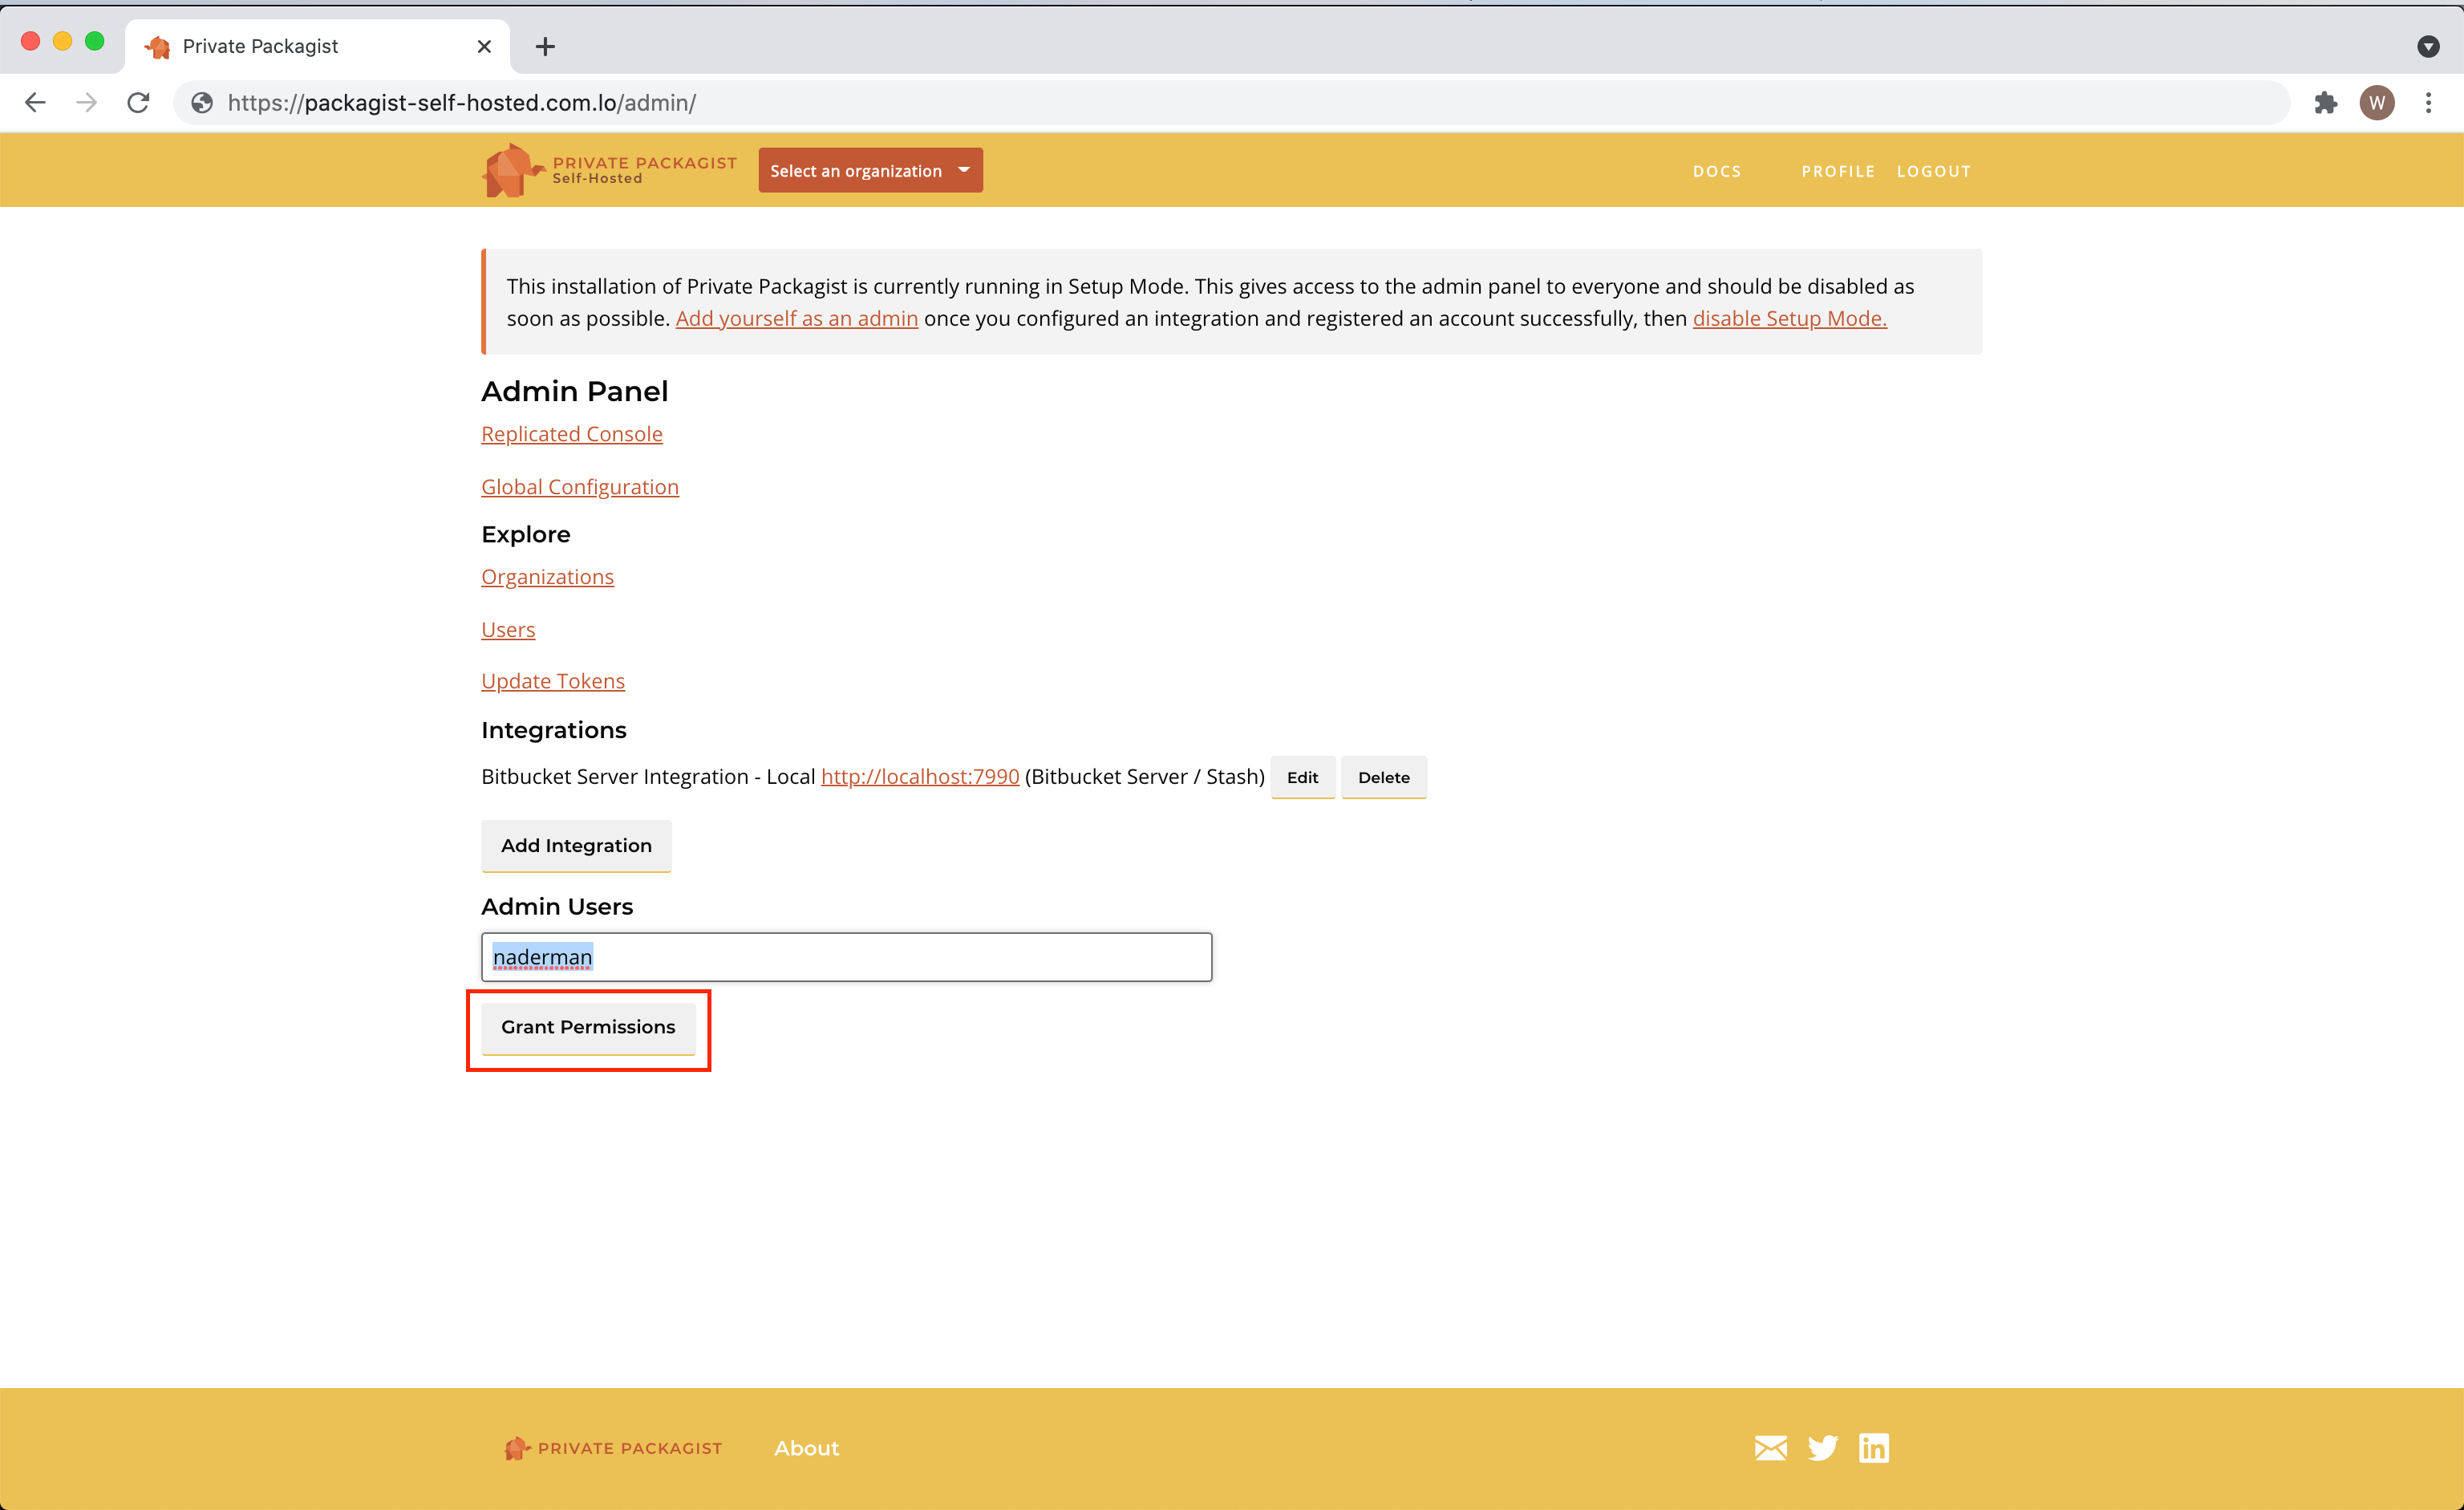
The first user is granted admin permissions automatically. You can grant admin permissions to more users in the admin panel.
Switching to Production Mode
Edit your values.yaml to disable the Setup Mode.
- Change
application.setupMode.enabledin the values.yaml - Apply the changes in your cluster with
helm upgrade - Restart the ui deployment to apply the changes in the application
kubectl rollout restart deployment ui
That’s it! Private Packagist Self-Hosted is now ready to be used! You’ll find all further information in the web interface.
Database and storage with dynamic volumes
Private Packagist Self-Hosted will set up PostgreSQL, Redis, and MinIO to store application data and Composer packages.
Each of them requires one or more volumes using dynamic volume provision to allocate storage for the different Pods.
Configure the Storage Class in the values.yaml under global.storageClass.
Alternatively, you can configure Private Packagist Self-Hosted to use your own PostgreSQL, Redis, and blob storage.
For blob storage, we currently support Azure Blob Storage, Google Cloud Storage, AWS S3, and other S3-compatible storage solutions.
You can configure the blob storage in the values.yaml under storage.type.
Security
The Private Packagist Self-Hosted application expects that TLS termination happens at or before the Ingress level. All traffic within the cluster is unencrypted.
Ensure your Kubernetes network plugin encrypts connections between pods to avoid potential security issues.
Backups
The Private Packagist Self-Hosted application integrates with Velero, a tool to back up and restore your Kubernetes cluster resources and persistent volumes. Private Packagist Self-Hosted provides annotations to help back up and restore the application with Velero.
If you are using your own backup solution, we recommend making regular backups of PostgreSQL, Redis, and the used blob storage.
Start Free Trial
Login to create an organization and start your free trial!