This guide explains how to set up an OAuth integration for Private Packagist Cloud with Bitbucket Data Center / Server. If you use their public service on bitbucket.org, these instructions are not relevant to you.
If you are using our Self-Hosted product, please use this guide.
Note: Application Links using OAuth 2 are available since Bitbucket Data Center / Server v7.21. If you are using an older Bitbucket Data Center / Server version then consult the Bitbucket Data Center / Server OAuth 1 setup guide.
To allow your users to authenticate to Private Packagist with their Bitbucket Data Center / Server account, you'll first need to create an integration in Private Packagist. This document walks you through the required steps.
Open the Add Integration form
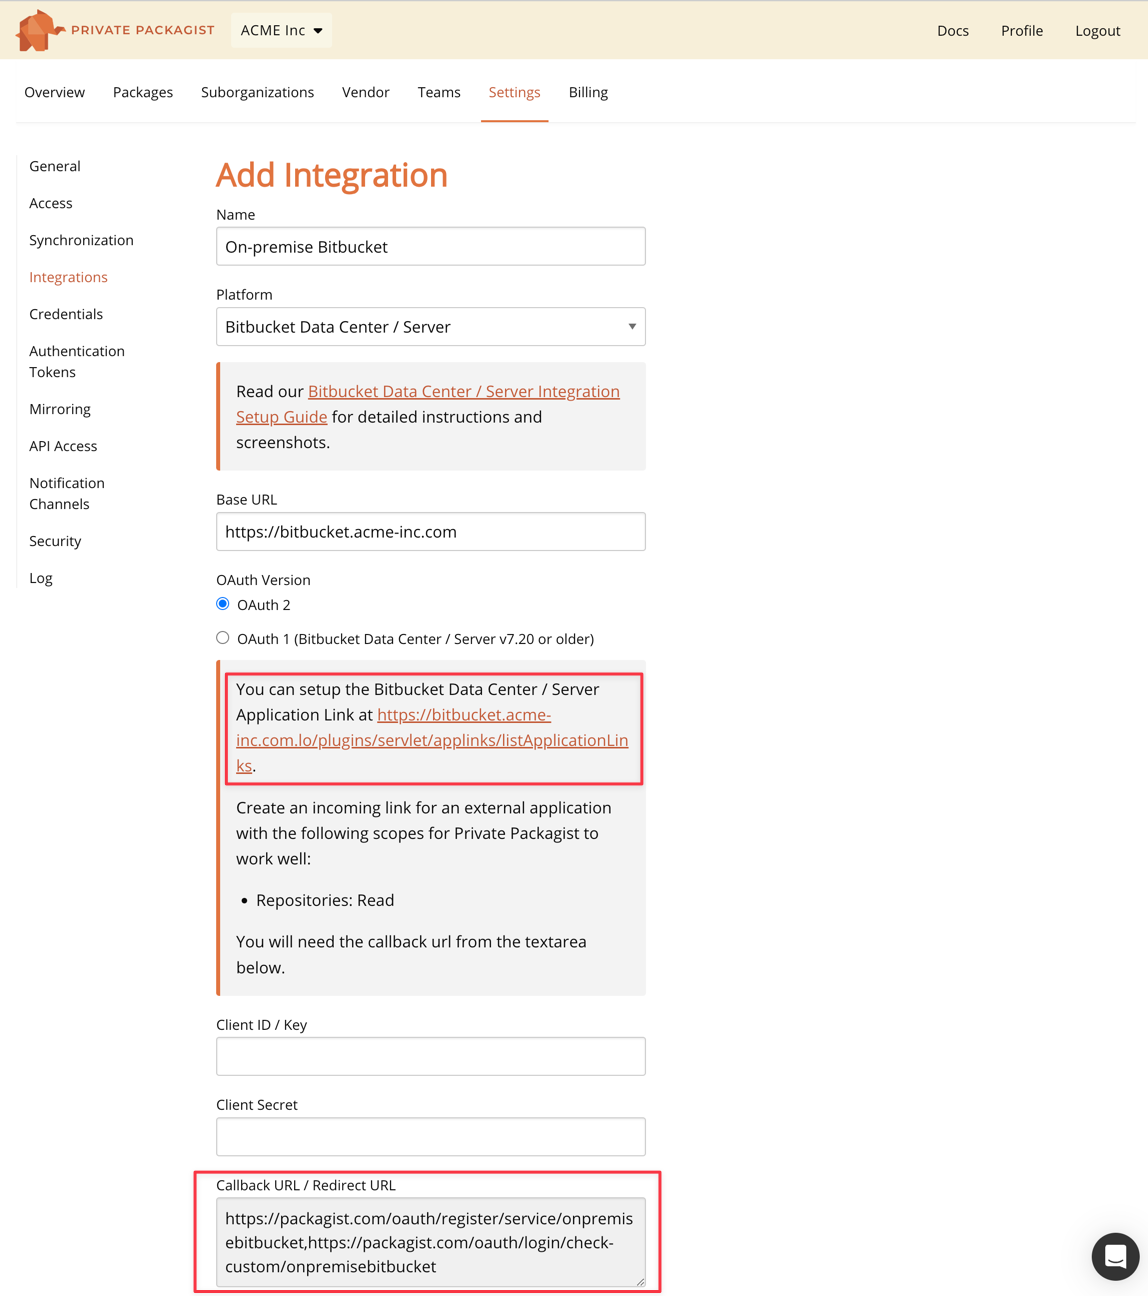
From the organization settings page, select the "Integrations" subtab. Hit the "Add Integration" button on the integrations listing page to get to the form below. To set up a Bitbucket Data Center / Server integration with Private Packagist start by selecting "Bitbucket Data Center / Server" as the platform, enter the URL of your on-premise Bitbucket server into the base URL field and select OAuth 2 as the OAuth version as seen in the example below.
A link to create a new OAuth application on your Bitbucket Data Center / Server instance will automatically be displayed.
Configure Application link
Do not submit the integration form yet, but copy the content from the "Callback URL / Redirect URL" and follow the setup link to your Bitbucket Data Center / Server instance. The fields Client ID and Client Secret remain empty for now.
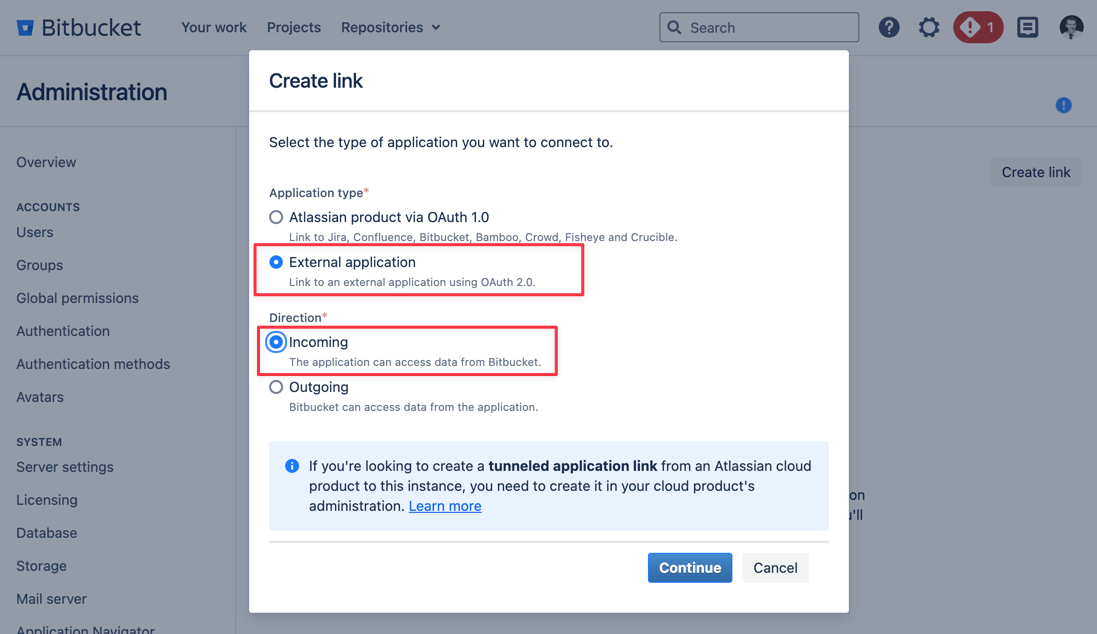
In Bitbucket Data Center / Server, click on the "Create link" button and select "External application" as type and "Incoming" as direction.
After you click the button to continue, enter a name and the content from the "Callback URL / Redirect URL" from the Private Packagist form. Select Repositories "Read" as application permission and save the form.
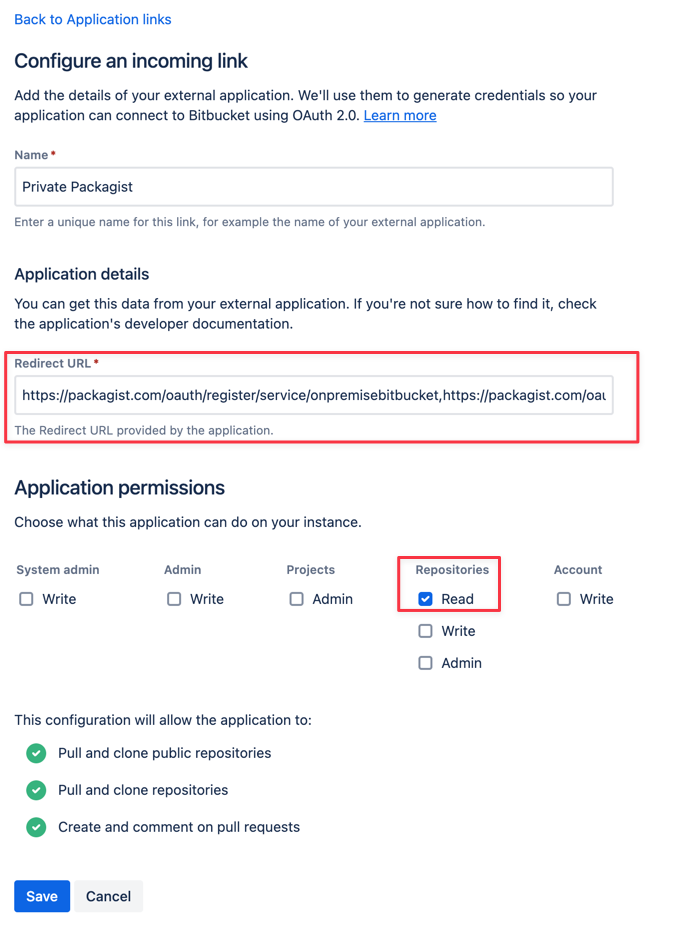
Once the form is saved, Bitbucket Data Center / Server will show you the Client ID and secret.
Finish the Setup
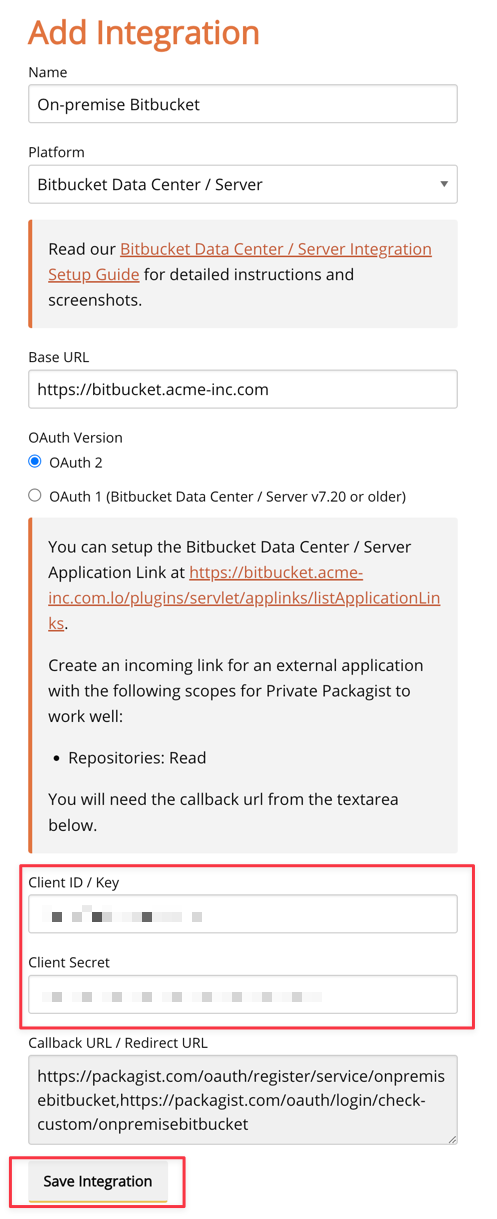
Copy and paste the "Client ID" and "Client Secret" values back into the Private Packagist integration form and submit the form with the "Create Integration" button.
You'll be redirected back to the list of integrations.
Share the Bitbucket login link
The final step is sharing your organization-specific login link with your users. Look for the "Login link" button next to your newly created Bitbucket Data Center / Server integration on the integrations page, and copy the URL.
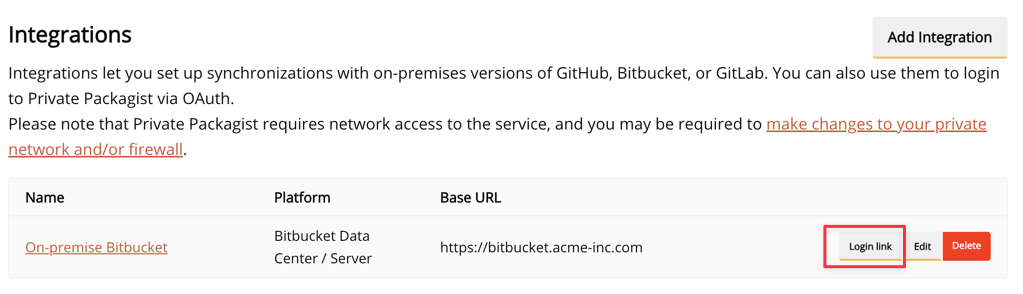
This link presents the option to authenticate with your Bitbucket Data Center / Server account and can now be used to log in to Private Packagist.
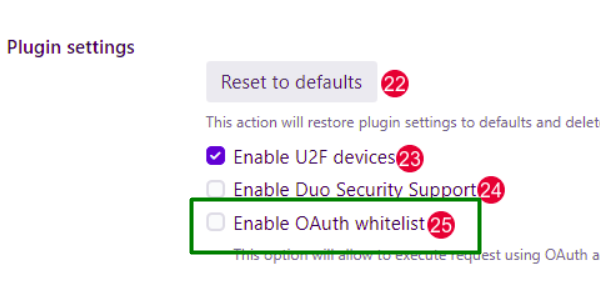
Configure Bitbucket Server plugins
In case the U2F & TOTP plugin by Alpha Server is installed on the Bitbucket Data Center / Server then you will need to enable the OAuth whitelist otherwise Private Packagist won't be able to authenticate with the Bitbucket Data Center / Server.
Start Free Trial
Login to create an organization and start your free trial!