

This guide explains how to set up an OAuth integration for Private Packagist Cloud with the on-premises version of GitLab. If you use their public service on GitLab.com, these instructions are not relevant to you.
If you are using our Self-Hosted product, please use this guide.
To allow your users to authenticate to Private Packagist with their GitLab account, you'll first need to create an integration in Private Packagist. This document walks you through the required steps.
Open the Add Integration form
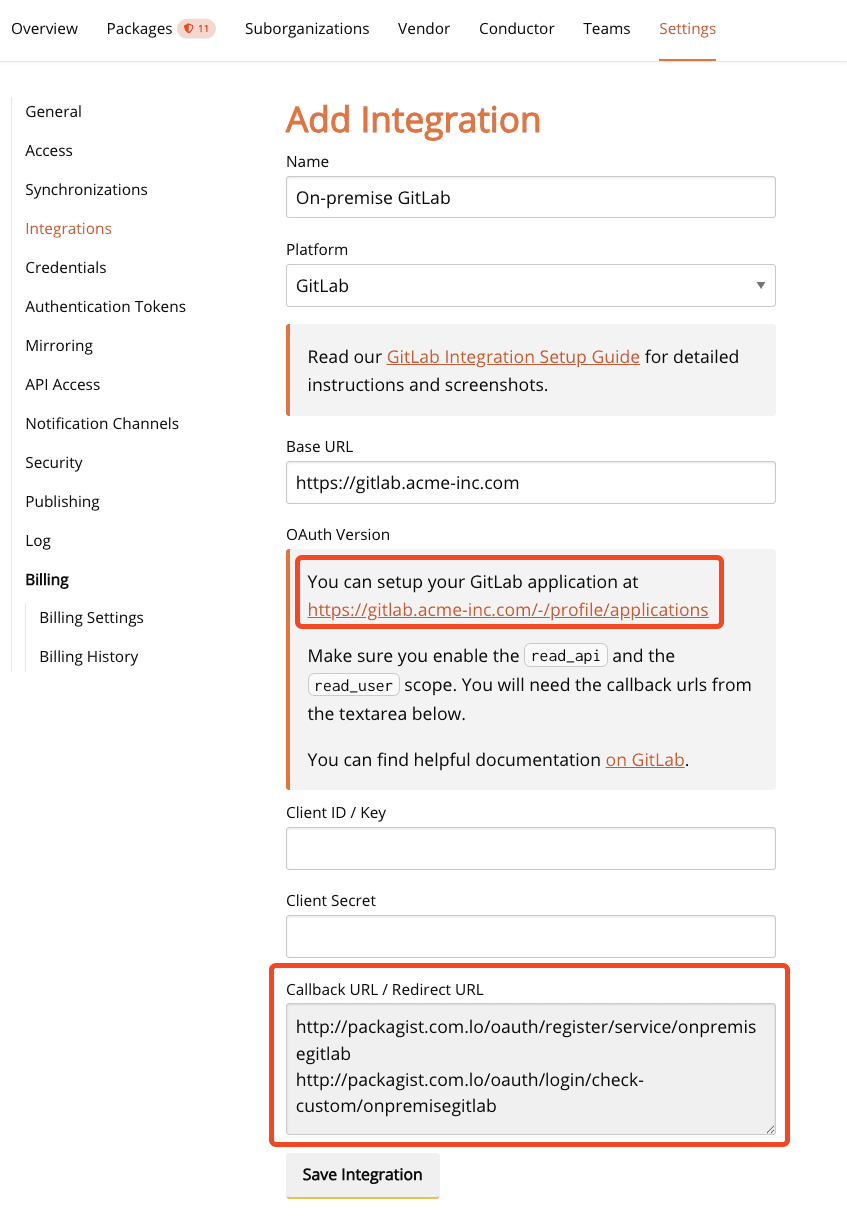
From the organization settings page, select the "Integrations" subtab. Hit the "Add Integration" button on the integrations listing page to get to the form below. To set up a GitLab Self-Managed integration with Private Packagist, start by selecting "GitLab" as the platform and enter the URL of your own GitLab server. A link to setup the OAuth application on your GitLab server will automatically be displayed.
Add an OAuth Application
Do not submit the integration form yet, but copy the content from the "Callback URL / Redirect URL" and follow the setup link to your GitLab server. The fields Client ID and Client Secret remain empty for now.
On the GitLab applications page, click the "Add new application" button and fill in the form as shown here:
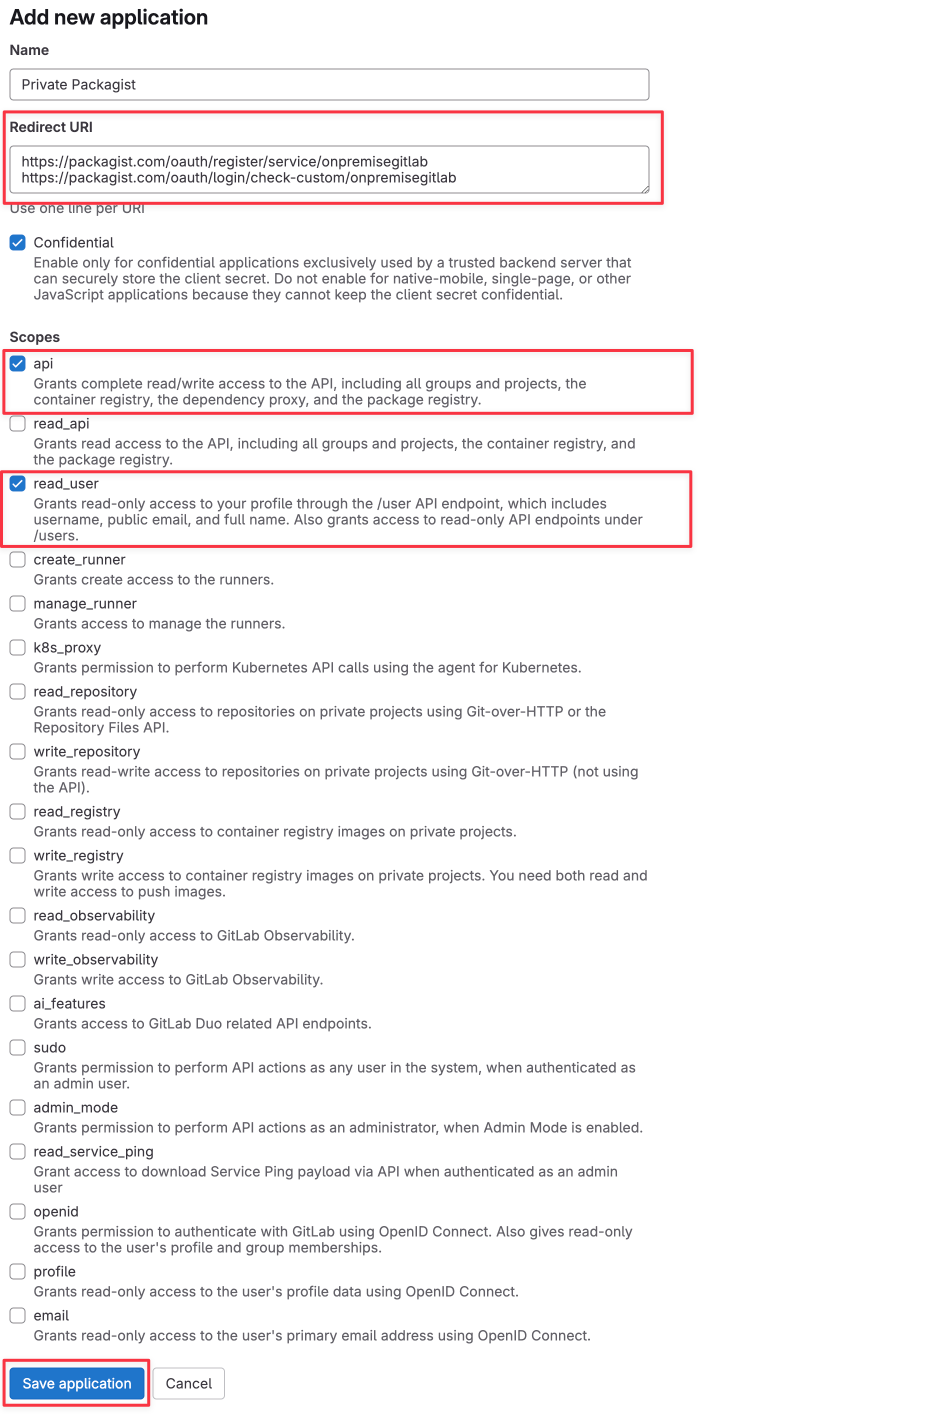
Make sure the read_api and read_user scopes are both checked and save the new application. This will reveal the credentials required to finish the setup on Private Packagist.
If you have full admin access on GitLab, then you can also create an application in the GitLab admin section under Applications.
There are two additional checkmarks on that page: trusted should remain unchecked, and confidential should remain checked.
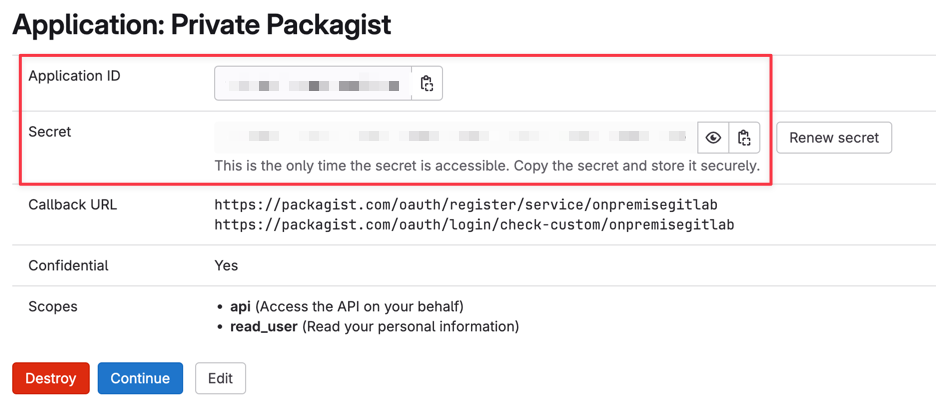
After you create the application, you will get a new Application ID and Secret. You'll need both these values to continue the set up in Private Packagist.
Finish the Setup
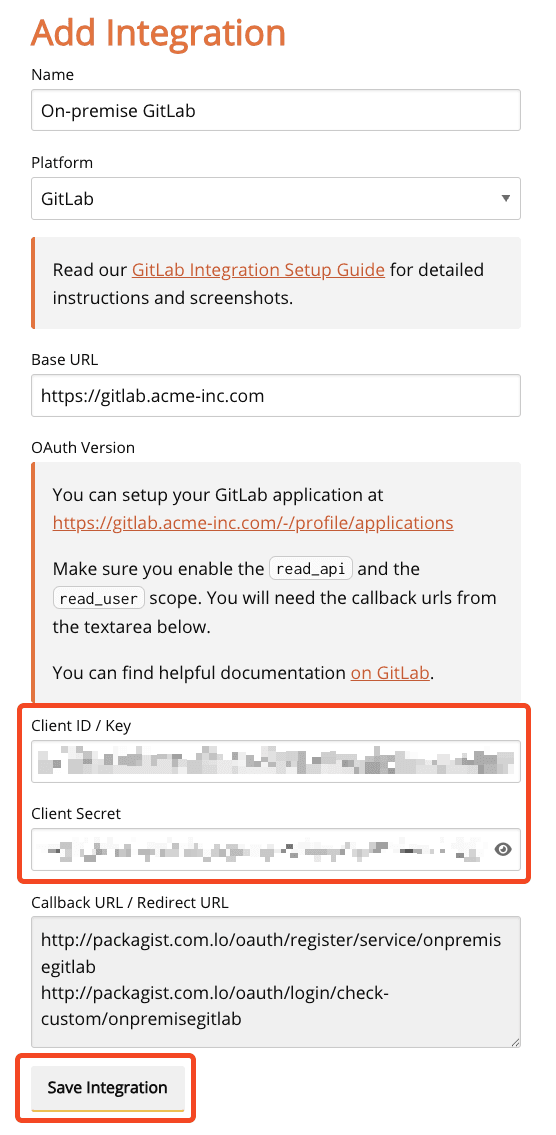
Copy and paste the "Application Id" and "Secret" value back into the Private Packagist integration form and submit the form with the "Save Integration" button.
You'll be redirected back to the list of integrations.
Share the GitLab login link
The final step is sharing your organization-specific login link with your users. Look for the "Login link" button next to your newly created GitLab integration on the integrations page, and copy the URL.
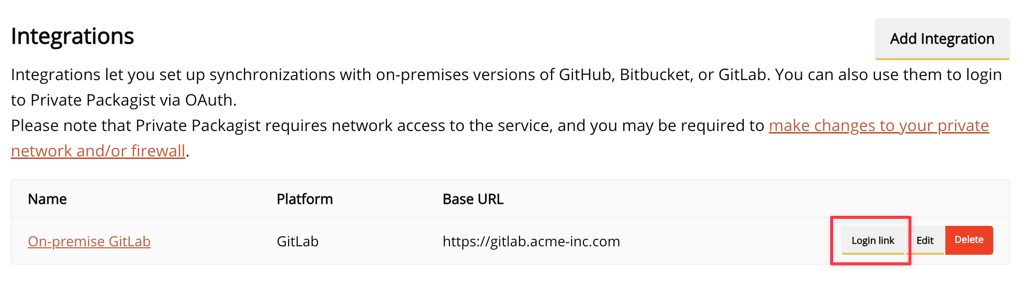
This link presents the option to authenticate with your GitLab account and can now be used to log in to Private Packagist.
Webhooks
Private Packagist configures both group and project webhooks on GitLab. If group webhooks cannot be configured, for example because the GitLab plan doesn't include them, project webhooks are still configured independently.
Group webhooks are used for synchronization. They notify Private Packagist about new repositories and changes to memberships and permissions. Group webhooks are only available as part of a GitLab Premium plan. If group webhooks cannot be configured, synchronization still runs on its regular schedule every 20 hours.
Project webhooks are used to keep packages up to date, for example when a new commit is pushed. They are linked directly to a single package, so having multiple packages pointing to the same GitLab repository sets up a separate hook for each package.
Start Free Trial
Login to create an organization and start your free trial!